
Mastering Resilience with Resilience4j: Rate Limiting & Circuit Breakers in Spring Boot

Introduction: Why Resilience is Non-Negotiable in Modern Systems
In today's distributed system landscape, microservices communicate constantly, often across network boundaries. While this architecture offers immense flexibility and scalability, it also introduces inherent fragility. A single slow or failing service can cascade into a complete system outage, leading to poor user experience, lost revenue, and damaged reputation. This is where resilience patterns become not just useful, but absolutely critical.
Imagine an e-commerce platform where the product recommendation service experiences a sudden spike in latency. Without proper safeguards, the main product page might hang, consuming valuable resources, and eventually crashing the entire application. Similarly, a third-party payment gateway might impose strict rate limits. Exceeding these limits could lead to temporary bans or outright denial of service, again impacting your application's ability to function.
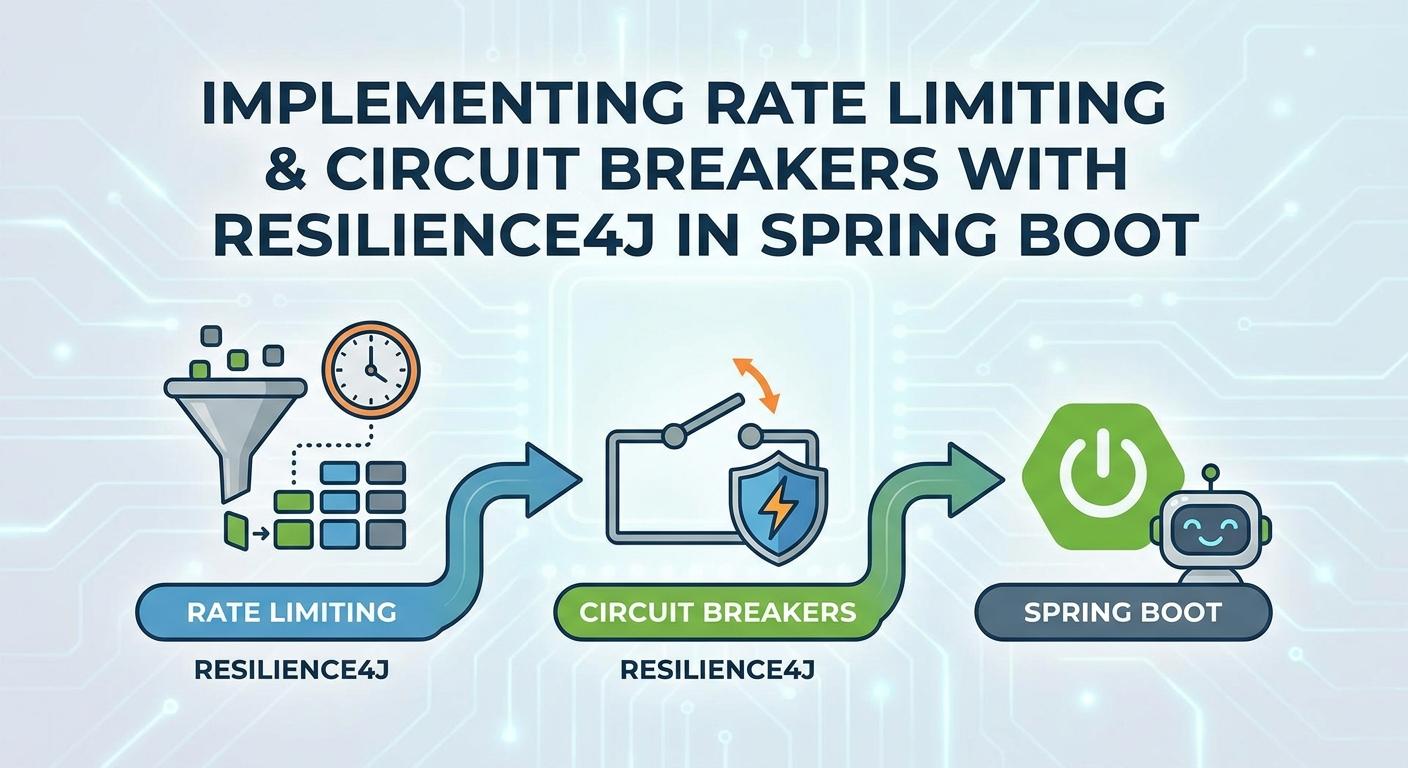
This comprehensive guide delves into two fundamental resilience patterns – Rate Limiting and Circuit Breakers – and demonstrates their implementation using Resilience4j within a Spring Boot application. Resilience4j is a lightweight, easy-to-use, and highly performable fault tolerance library inspired by Netflix Hystrix, but designed for Java 8+ and functional programming paradigms.
By the end of this article, you will have a solid understanding of how to protect your services from upstream failures and resource exhaustion, ensuring your applications remain stable, responsive, and fault-tolerant.
Prerequisites
Before we dive into the implementation, ensure you have the following:
- Java 11+: The examples use modern Java features.
- Maven or Gradle: For dependency management.
- Spring Boot 2.x or 3.x: A basic understanding of Spring Boot applications.
- IDE: IntelliJ IDEA, Eclipse, or VS Code.
Understanding Resilience in Distributed Systems
Resilience refers to a system's ability to recover from failures and continue to function, perhaps in a degraded manner. In distributed systems, failures are inevitable. They can manifest as:
- Network Latency: Slow communication between services.
- Service Overload: A service receives more requests than it can handle.
- Dependency Failure: A critical external service (database, third-party API) becomes unavailable.
- Resource Exhaustion: Running out of threads, memory, or connections.
To combat these issues, resilience patterns aim to:
- Prevent Cascading Failures: Isolate failures to prevent them from spreading.
- Degrade Gracefully: Provide partial functionality rather than complete outage.
- Improve Availability: Ensure core services remain accessible.
- Manage Load: Control the flow of requests to prevent overload.
Introduction to Resilience4j
Resilience4j is a fault tolerance library that helps developers build resilient applications. It provides higher-order functions (decorators) to enhance any functional interface, lambda expression, or method reference with a Circuit Breaker, Rate Limiter, Retry, Bulkhead, or Time Limiter.
Key advantages of Resilience4j:
- Lightweight: Minimal dependencies, built on functional programming concepts.
- Modular: You only include the modules you need.
- Reactive: Supports reactive programming out-of-the-box.
- Integration: Seamless integration with Spring Boot, Micrometer, and Reactor.
- Performance: Designed for low-latency and high-throughput environments.
While Netflix Hystrix was a pioneer in this space, it is now in maintenance mode. Resilience4j is its modern, actively developed successor, leveraging Java 8's functional features.
Setting Up Your Spring Boot Project
Let's start by creating a new Spring Boot project (or using an existing one) and adding the necessary Resilience4j dependencies. You can use Spring Initializr (start.spring.io) and add the "Spring Web" dependency.
For Maven, add the following to your pom.xml:
<!-- Resilience4j Core -->
<dependency>
    <groupId>io.github.resilience4j</groupId>
    <artifactId>resilience4j-spring-boot3</artifactId>
    <version>2.2.0</version>
</dependency>

<!-- Resilience4j Annotations (for @CircuitBreaker, @RateLimiter etc.) -->
<dependency>
    <groupId>io.github.resilience4j</groupId>
    <artifactId>resilience4j-annotations</artifactId>
    <version>2.2.0</version>
</dependency>

<!-- Resilience4j Metrics (for monitoring) -->
<dependency>
    <groupId>io.github.resilience4j</groupId>
    <artifactId>resilience4j-micrometer</artifactId>
    <version>2.2.0</version>
</dependency>

<!-- Spring Boot Actuator for exposing metrics -->
<dependency>
    <groupId>org.springframework.boot</groupId>
    <artifactId>spring-boot-starter-actuator</artifactId>
</dependency>

<!-- Micrometer Prometheus registry for exposing metrics to Prometheus -->
<dependency>
    <groupId>io.micrometer</groupId>
    <artifactId>micrometer-registry-prometheus</artifactId>
</dependency>
Note: Adjust resilience4j version and spring-boot3 artifact based on your Spring Boot version. For Spring Boot 2.x, use resilience4j-spring-boot2.
Implementing Rate Limiting with RateLimiter
Rate limiting is a mechanism to control the rate at which an API or service is called. It prevents resource exhaustion, protects against abuse, and ensures fair usage among clients. When the predefined rate limit is exceeded, subsequent requests are typically rejected or queued until the rate falls below the threshold.
What is Rate Limiting?
Rate limiting works by defining a maximum number of requests allowed within a specific time period. For example, 10 requests per second. If a client attempts to make an 11th request within that second, it will be denied.
Configuration via application.yml
Resilience4j allows easy configuration of Rate Limiters via your application.yml or application.properties file.
Let's define a Rate Limiter named myRateLimiter:
resilience4j.ratelimiter:
  instances:
    myRateLimiter:
      limitForPeriod: 2 # Allow 2 requests per second
      limitRefreshPeriod: 1s # Refill every 1 second
      timeoutDuration: 0s # How long to wait for a permission if none are available (0s means no wait)
# registerHealthIndicator: true # Optional: Register a Spring Boot Health IndicatorlimitForPeriod: The number of permissions available during alimitRefreshPeriod.limitRefreshPeriod: The time period after which thelimitForPeriodis reset.timeoutDuration: How long a calling thread should wait to obtain a permission. If set to 0s, it will immediately throw aRequestNotPermittedexception if no permission is available.
Using @RateLimiter Annotation
Now, let's apply this Rate Limiter to a service method.
First, create a simple service:
package com.example.resilience4jdemo.service;

import org.slf4j.Logger;
import org.slf4j.LoggerFactory;
import org.springframework.stereotype.Service;

@Service
public class ExternalApiService {

    private static final Logger logger = LoggerFactory.getLogger(ExternalApiService.class);

    public String callExternalService() {
        logger.info("Calling external service...");
        // Simulate an external API call
        return "Data from external service";
    }
}
Next, create a REST controller that uses this service and applies the @RateLimiter annotation:
package com.example.resilience4jdemo.controller;

import com.example.resilience4jdemo.service.ExternalApiService;
import io.github.resilience4j.ratelimiter.annotation.RateLimiter;
import org.slf4j.Logger;
import org.slf4j.LoggerFactory;
import org.springframework.beans.factory.annotation.Autowired;
import org.springframework.http.HttpStatus;
import org.springframework.http.ResponseEntity;
import org.springframework.web.bind.annotation.GetMapping;
import org.springframework.web.bind.annotation.RequestMapping;
import org.springframework.web.bind.annotation.RestController;

@RestController
@RequestMapping("/api")
public class MyApiController {

    private static final Logger logger = LoggerFactory.getLogger(MyApiController.class);

    @Autowired
    private ExternalApiService externalApiService;

    @GetMapping("/rate-limited-endpoint")
    @RateLimiter(name = "myRateLimiter", fallbackMethod = "rateLimiterFallback")
    public ResponseEntity<String> rateLimitedEndpoint() {
        logger.info("Attempting to call rate-limited endpoint.");
        String result = externalApiService.callExternalService();
        return ResponseEntity.ok("Success: " + result);
    }

    // Fallback method must have the same signature as the original method, plus a Throwable parameter
    public ResponseEntity<String> rateLimiterFallback(Throwable t) {
        logger.warn("Rate limiter fallback executed: {}", t.getMessage());
        return ResponseEntity.status(HttpStatus.TOO_MANY_REQUESTS)
                             .body("Too many requests. Please try again later.");
    }
}
When you hit /api/rate-limited-endpoint more than twice within a second, you'll receive a 429 Too Many Requests response, and the rateLimiterFallback method will be invoked. The logs will show RequestNotPermitted exceptions being handled by the fallback.
Implementing Circuit Breakers with CircuitBreaker
A Circuit Breaker is a design pattern used to prevent an application from repeatedly trying to execute an operation that is likely to fail. It detects failures and, if the failure rate reaches a certain threshold, it "opens" the circuit, preventing further calls to the failing service. After a configurable timeout, it "half-opens" the circuit to test if the service has recovered.
What is a Circuit Breaker? States Explained
The Circuit Breaker has three main states:
- CLOSED: The normal state. Calls to the protected operation succeed. If the failure rate exceeds a threshold, the circuit transitions to OPEN.
- OPEN: Calls to the protected operation fail immediately (fast-fail). After a configurable
waitDurationInOpenState, the circuit transitions to HALF_OPEN. - HALF_OPEN: A limited number of test calls are allowed to pass through to the protected operation. If these test calls succeed, the circuit transitions back to CLOSED. If they fail, it transitions back to OPEN.
Configuration via application.yml
Let's configure a Circuit Breaker named myCircuitBreaker:
resilience4j.circuitbreaker:
  instances:
    myCircuitBreaker:
      failureRateThreshold: 50 # Percentage of failed calls to trip the circuit (50%)
      waitDurationInOpenState: 5s # Time the circuit stays open before half-opening
      permittedNumberOfCallsInHalfOpenState: 3 # Number of calls allowed in HALF_OPEN state
      slidingWindowType: COUNT_BASED # or TIME_BASED
      slidingWindowSize: 10 # Number of calls in the sliding window to calculate failure rate
      minimumNumberOfCalls: 5 # Minimum number of calls before failure rate is calculated
# registerHealthIndicator: true # Optional: Register a Spring Boot Health IndicatorfailureRateThreshold: The percentage of calls that must fail to trip the circuit.waitDurationInOpenState: How long the circuit remains open before transitioning to HALF_OPEN.permittedNumberOfCallsInHalfOpenState: The number of calls allowed in the HALF_OPEN state to test the backend service.slidingWindowType: Defines how the failure rate is calculated (COUNT_BASED or TIME_BASED).slidingWindowSize: The size of the sliding window, either in number of calls (COUNT_BASED) or seconds (TIME_BASED).minimumNumberOfCalls: The minimum number of calls that must be recorded before the failure rate threshold is applied.
Using @CircuitBreaker Annotation
Let's modify our ExternalApiService to simulate failures and then apply the Circuit Breaker.
package com.example.resilience4jdemo.service;

import org.slf4j.Logger;
import org.slf4j.LoggerFactory;
import org.springframework.stereotype.Service;

@Service
public class ExternalApiService {

    private static final Logger logger = LoggerFactory.getLogger(ExternalApiService.class);
    private int callCount = 0;

    public String callExternalService() {
        callCount++;
        logger.info("Calling external service. Call count: {}", callCount);

        // Simulate a failure for the first 6 calls to trip the circuit (50% failure rate with 10 calls, min 5 calls)
        if (callCount < 7) {
            logger.error("Simulating external service failure for call {}", callCount);
            throw new RuntimeException("External service unavailable!");
        }

        logger.info("External service call successful for call {}", callCount);
        return "Data from external service";
    }
}
Now, update the controller to use the @CircuitBreaker:
package com.example.resilience4jdemo.controller;

import com.example.resilience4jdemo.service.ExternalApiService;
import io.github.resilience4j.circuitbreaker.annotation.CircuitBreaker;
import org.slf4j.Logger;
import org.slf4j.LoggerFactory;
import org.springframework.beans.factory.annotation.Autowired;
import org.springframework.http.HttpStatus;
import org.springframework.http.ResponseEntity;
import org.springframework.web.bind.annotation.GetMapping;
import org.springframework.web.bind.annotation.RequestMapping;
import org.springframework.web.bind.annotation.RestController;

@RestController
@RequestMapping("/api")
public class MyApiController {

    private static final Logger logger = LoggerFactory.getLogger(MyApiController.class);

    @Autowired
    private ExternalApiService externalApiService;

    @GetMapping("/circuit-breaker-endpoint")
    @CircuitBreaker(name = "myCircuitBreaker", fallbackMethod = "circuitBreakerFallback")
    public ResponseEntity<String> circuitBreakerEndpoint() {
        logger.info("Attempting to call circuit-breaker-protected endpoint.");
        String result = externalApiService.callExternalService();
        return ResponseEntity.ok("Success: " + result);
    }

    public ResponseEntity<String> circuitBreakerFallback(Throwable t) {
        logger.warn("Circuit breaker fallback executed: {}", t.getMessage());
        return ResponseEntity.status(HttpStatus.SERVICE_UNAVAILABLE)
                             .body("Service currently unavailable. Please try again later.");
    }
}
Hit /api/circuit-breaker-endpoint repeatedly:
- Initial calls will fail, triggering the
circuitBreakerFallback. - After about 5-6 failures (depending on
minimumNumberOfCallsandfailureRateThreshold), the circuit will open. Subsequent calls will immediately hit the fallback without even attempting to callexternalApiService. - After
waitDurationInOpenState(5 seconds in our config), the circuit will transition to HALF_OPEN. The nextpermittedNumberOfCallsInHalfOpenState(3 calls) will be allowed through to test theexternalApiService. If these calls succeed (aftercallCountis >= 7), the circuit closes. - If the test calls fail, the circuit returns to the OPEN state.
This demonstrates how the Circuit Breaker protects your application from continuously hammering a failing service, giving it time to recover.
Combining Rate Limiting and Circuit Breakers
Rate limiting and circuit breakers are complementary. Rate limiting protects your service from being overwhelmed by too many requests, while circuit breakers protect your service from failing dependencies.
You can apply both annotations to the same method:
package com.example.resilience4jdemo.controller;

import com.example.resilience4jdemo.service.ExternalApiService;
import io.github.resilience4j.circuitbreaker.annotation.CircuitBreaker;
import io.github.resilience4j.ratelimiter.annotation.RateLimiter;
import org.slf4j.Logger;
import org.slf4j.LoggerFactory;
import org.springframework.beans.factory.annotation.Autowired;
import org.springframework.http.HttpStatus;
import org.springframework.http.ResponseEntity;
import org.springframework.web.bind.annotation.GetMapping;
import org.springframework.web.bind.annotation.RequestMapping;
import org.springframework.web.bind.annotation.RestController;

@RestController
@RequestMapping("/api")
public class MyApiController {

    private static final Logger logger = LoggerFactory.getLogger(MyApiController.class);

    @Autowired
    private ExternalApiService externalApiService;

    @GetMapping("/protected-endpoint")
    @RateLimiter(name = "myRateLimiter", fallbackMethod = "combinedFallback")
    @CircuitBreaker(name = "myCircuitBreaker", fallbackMethod = "combinedFallback")
    public ResponseEntity<String> protectedEndpoint() {
        logger.info("Attempting to call fully protected endpoint.");
        String result = externalApiService.callExternalService();
        return ResponseEntity.ok("Success: " + result);
    }

    public ResponseEntity<String> combinedFallback(Throwable t) {
        logger.warn("Combined fallback executed due to: {}", t.getClass().getSimpleName());
        if (t instanceof io.github.resilience4j.ratelimiter.RequestNotPermitted) {
            return ResponseEntity.status(HttpStatus.TOO_MANY_REQUESTS)
                                 .body("Too many requests. Please try again later.");
        } else if (t instanceof io.github.resilience4j.circuitbreaker.CallNotPermittedException) {
             return ResponseEntity.status(HttpStatus.SERVICE_UNAVAILABLE)
                                 .body("Service is currently unavailable due to circuit open. Please try again later.");
        } else {
            return ResponseEntity.status(HttpStatus.INTERNAL_SERVER_ERROR)
                                 .body("An unexpected error occurred: " + t.getMessage());
        }
    }
}
When both are applied, Resilience4j typically applies them in a chain. The order of execution for annotations generally follows the order they are declared in the aspect, but it's safer to assume a specific chain like: RateLimiter -> Bulkhead -> CircuitBreaker -> Retry -> TimeLimiter.
In this example, the RateLimiter will be checked first. If permissions are granted, then the CircuitBreaker will evaluate the call. If either fails, the combinedFallback is invoked, and we can inspect the Throwable to determine the specific cause.
Monitoring and Metrics with Micrometer and Prometheus/Grafana
Implementing resilience patterns without monitoring is like flying blind. You need to know the state of your Rate Limiters and Circuit Breakers to understand how your system is performing and reacting to stress.
Resilience4j integrates seamlessly with Micrometer, Spring Boot's metrics facade, allowing you to expose metrics to various monitoring systems like Prometheus.
-
Dependencies: We already added
resilience4j-micrometerandmicrometer-registry-prometheusin the setup section. -
Enable Actuator Endpoints: Ensure your
application.ymlexposes the necessary Actuator endpoints:yamlmanagement: endpoints: web: exposure: include: "health,info,prometheus" metrics: tags: application: ${spring.application.name} -
Access Metrics: Once your application is running, you can access the Prometheus metrics endpoint at
http://localhost:8080/actuator/prometheus(assuming default port).
You'll see metrics like:
resilience4j_circuitbreaker_state: Current state of the circuit breaker (e.g.,CLOSED,OPEN,HALF_OPEN).resilience4j_circuitbreaker_calls_total: Total number of calls, categorized by outcome (successful, failed, not permitted).resilience4j_ratelimiter_waiting_threads_total: Number of threads currently waiting for a permission.resilience4j_ratelimiter_available_permissions_total: Number of available permissions in the rate limiter.
These metrics are invaluable for building dashboards in Grafana to visualize your service's resilience in real-time. You can monitor:
- Circuit breaker state transitions.
- Failure rates.
- Rate limiter rejections.
- Latency impact of resilience patterns.
Advanced Configurations and Customizations
While application.yml is convenient, Resilience4j offers more programmatic control for complex scenarios.
Customizing CircuitBreakerConfig Programmatically
You can define and register custom configurations for your Circuit Breakers using a Customizer bean:
package com.example.resilience4jdemo.config;

import io.github.resilience4j.circuitbreaker.CircuitBreakerConfig;
import io.github.resilience4j.circuitbreaker.CircuitBreakerRegistry;
import io.github.resilience4j.common.circuitbreaker.configuration.CircuitBreakerConfigCustomizer;
import org.springframework.context.annotation.Bean;
import org.springframework.context.annotation.Configuration;

import java.time.Duration;

@Configuration
public class ResilienceConfig {

    @Bean
    public CircuitBreakerConfigCustomizer testCircuitBreakerCustomizer() {
        return CircuitBreakerConfigCustomizer.of("myCircuitBreaker",
                builder -> builder.failureRateThreshold(60) // Higher failure rate to open
                                  .waitDurationInOpenState(Duration.ofSeconds(10)) // Longer wait
                                  .slidingWindowSize(20) // Larger window
                                  .minimumNumberOfCalls(10));
    }

    // You can also create and register CircuitBreakers manually if not using annotations
    @Bean
    public CircuitBreakerRegistry circuitBreakerRegistry() {
        CircuitBreakerConfig config = CircuitBreakerConfig.custom()
                .failureRateThreshold(70)
                .waitDurationInOpenState(Duration.ofSeconds(15))
                .build();
        return CircuitBreakerRegistry.of(config);
    }
}
This approach is useful when you have dynamic configurations or specific needs that can't be covered by simple YAML entries.
Customizing RateLimiterConfig Programmatically
Similarly, for Rate Limiters:
package com.example.resilience4jdemo.config;

import io.github.resilience4j.common.ratelimiter.configuration.RateLimiterConfigCustomizer;
import org.springframework.context.annotation.Bean;
import org.springframework.context.annotation.Configuration;

import java.time.Duration;

@Configuration
public class ResilienceConfig {

    @Bean
    public RateLimiterConfigCustomizer testRateLimiterCustomizer() {
        return RateLimiterConfigCustomizer.of("myRateLimiter",
                builder -> builder.limitForPeriod(5) // Allow 5 requests per second
                                  .limitRefreshPeriod(Duration.ofSeconds(1))
                                  .timeoutDuration(Duration.ofMillis(100))); // Wait up to 100ms
    }
}
Event Publishers
Resilience4j provides event publishers for each pattern, allowing you to react to state changes. For example, you can log circuit breaker events:
package com.example.resilience4jdemo.config;

import io.github.resilience4j.circuitbreaker.CircuitBreakerRegistry;
import jakarta.annotation.PostConstruct;
import org.slf4j.Logger;
import org.slf4j.LoggerFactory;
import org.springframework.beans.factory.annotation.Autowired;
import org.springframework.context.annotation.Configuration;

@Configuration
public class ResilienceEventLogger {

    private static final Logger logger = LoggerFactory.getLogger(ResilienceEventLogger.class);

    @Autowired
    private CircuitBreakerRegistry circuitBreakerRegistry;

    @PostConstruct
    public void setupCircuitBreakerEventLogging() {
        circuitBreakerRegistry.circuitBreaker("myCircuitBreaker")
                .getEventPublisher()
                .onStateTransition(event -> logger.info("Circuit Breaker '{}' State Transition: {}", event.getCircuitBreakerName(), event.getStateTransition()))
                .onCallNotPermitted(event -> logger.warn("Circuit Breaker '{}' Call Not Permitted: {}", event.getCircuitBreakerName(), event.getEventType()))
                .onError(event -> logger.error("Circuit Breaker '{}' Error: {} - {}", event.getCircuitBreakerName(), event.getEventType(), event.getThrowable().getMessage()));

        // Similar event publishers exist for RateLimiter, Retry, etc.
    }
}
This is incredibly useful for debugging and understanding the runtime behavior of your resilience patterns.
Best Practices for Resilience Patterns
- Granularity: Apply resilience patterns at the appropriate level. For example, a Circuit Breaker should wrap calls to a specific external service, not your entire application.
- Sensible Defaults: Start with reasonable default configurations and fine-tune them based on actual load testing and production monitoring.
- Robust Fallbacks: Fallback methods are crucial. They should be lightweight, fast, and provide a meaningful degraded experience. Avoid complex logic or external calls within fallbacks.
- Asynchronous Operations: For long-running or potentially blocking calls, consider combining Resilience4j with asynchronous patterns (e.g.,
CompletableFuture, Reactor) to prevent thread pool exhaustion. - Monitoring is Key: Always monitor the state and metrics of your resilience patterns. This allows you to observe their effectiveness and identify areas for improvement.
- Testing: Thoroughly test your resilience patterns under various failure conditions (e.g., injecting latency, simulating service unavailability) in development and staging environments.
- Configuration Management: Store your resilience configurations external to your application (e.g., Spring Cloud Config, Kubernetes ConfigMaps) for easier updates without redeployment.
- Graceful Degradation: Think about what functionality can be sacrificed or degraded when a dependency fails. Can you show cached data? Can you disable a non-critical feature?
Common Pitfalls and How to Avoid Them
- Over-configuration: Too many different configurations for similar services can lead to management overhead. Group services with similar characteristics.
- Insufficient Testing: Assuming resilience patterns work without proper testing is risky. Simulate failures to validate your configurations and fallback logic.
- Ignoring Monitoring: Without metrics, you won't know if your patterns are actually helping or if they are misconfigured.
- Complex Fallback Logic: Fallbacks should be simple and fail-safe. A failing fallback is worse than no fallback at all.
- Circuit Breaker on Internal Logic: Circuit breakers are for external dependencies or shared resources, not for internal application logic failures.
- Rate Limiting Self-Imposed Limits: Ensure your rate limits are aligned with external service limits and your own system's capacity. Don't rate limit yourself into a denial of service.
- Not Handling
RequestNotPermitted: Always provide a fallback forRequestNotPermittedexceptions from Rate Limiter, otherwise, your users will see raw exceptions.
Real-World Use Cases
1. API Gateway Protection
An API Gateway often aggregates requests to multiple downstream microservices and external APIs. Rate limiting can protect the gateway from being overwhelmed by client requests, while circuit breakers can prevent a failing downstream service from taking down the entire gateway.
2. Microservice Communication
When Service A calls Service B, a circuit breaker on Service A for calls to Service B can prevent Service A from accumulating pending requests and exhausting its resources if Service B becomes unresponsive.
3. Third-Party Service Integration
Integrating with external payment processors, shipping APIs, or social media platforms often comes with strict rate limits and varying reliability. Resilience4j patterns are essential here to respect external limits and handle outages gracefully, preventing your application from being banned or crippled by a third-party failure.
4. Database Access
While less common for direct circuit breaking (as connection pools often handle this), for very specific, high-risk database operations or integrations with external data sources, a circuit breaker could prevent a flood of failed queries during a database incident.
Conclusion: Building Robust Systems with Resilience4j
Building resilient applications is no longer an optional feature but a fundamental requirement for any modern distributed system. Resilience4j provides a powerful, flexible, and lightweight toolkit to implement critical fault tolerance patterns like Rate Limiting and Circuit Breakers in your Spring Boot applications.
By carefully configuring these patterns, providing robust fallback mechanisms, and diligently monitoring their behavior, you can significantly enhance the stability and availability of your services. Remember that resilience is an ongoing journey, requiring continuous testing, observation, and refinement. Embrace Resilience4j to empower your Spring Boot microservices to withstand the inevitable challenges of the distributed world, ensuring a consistent and reliable experience for your users.
Now, go forth and build more resilient systems!
Written by
CodewithYohaFull-Stack Software Engineer with 7+ years of experience in Java, Spring Boot, and cloud architecture across AWS, Azure, and GCP. Writing production-grade engineering patterns for developers who ship real software.