
Securing Microservices with OAuth 2.1 & OpenID Connect in Spring Security

Introduction
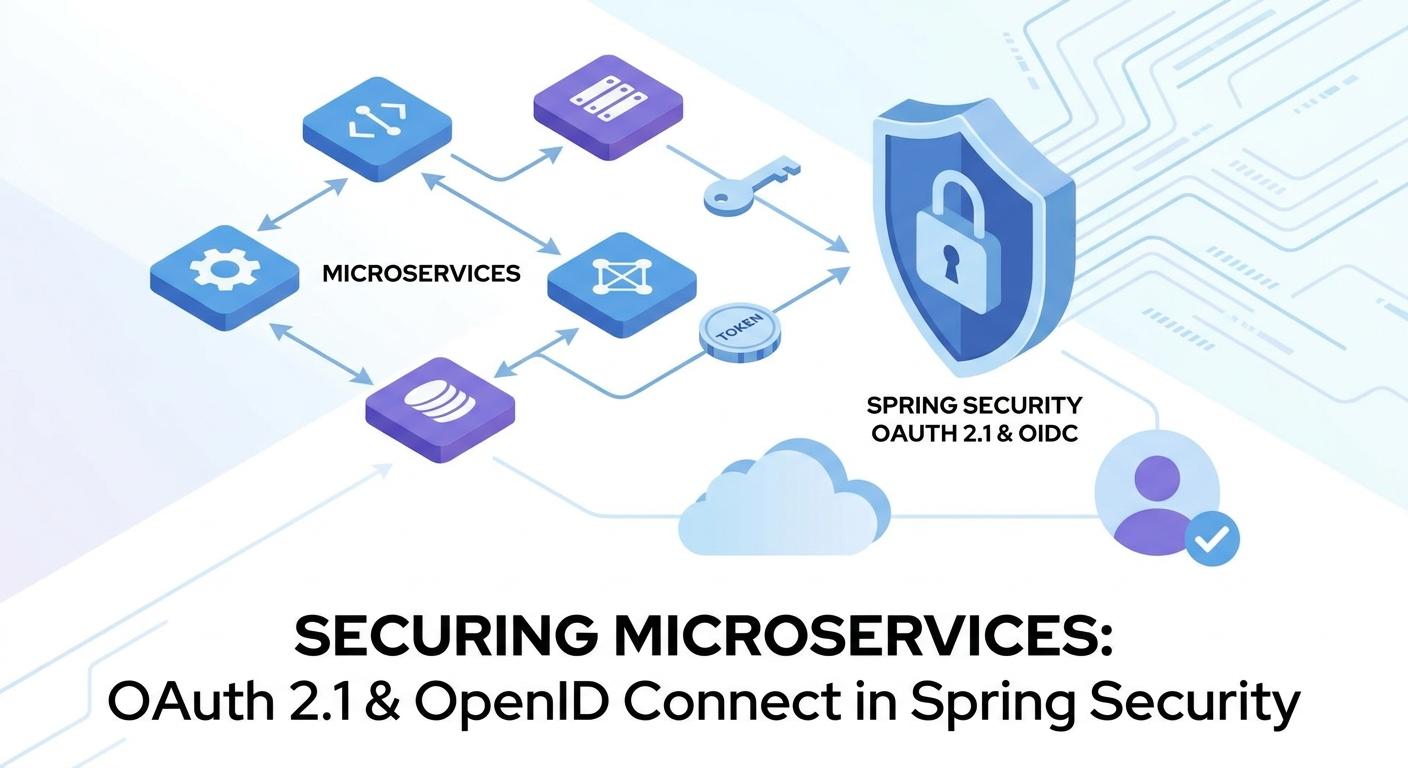
In the era of distributed systems, microservices offer unparalleled flexibility, scalability, and resilience. However, this architectural paradigm introduces significant security challenges. As services become more granular and communicate across networks, traditional monolithic security approaches fall short.
Securing microservices effectively requires a robust, standardized framework for authentication and authorization. This is where OAuth 2.1 and OpenID Connect (OIDC), integrated seamlessly with Spring Security, become indispensable. OAuth 2.1 provides a secure delegation framework for authorization, while OIDC builds on top of it to offer identity verification.
This comprehensive guide will walk you through the process of securing your Spring Boot microservices using OAuth 2.1 and OIDC, leveraging Spring Security's powerful capabilities. We'll cover everything from client setup to resource server protection, role-based access control, and best practices.
Prerequisites
Before diving in, ensure you have the following:
- Java 17 or higher
- Spring Boot 3.0 or higher
- Basic understanding of Spring Security, OAuth 2.0, and OpenID Connect concepts.
- An OpenID Connect Provider (OP) such as Keycloak, Okta, Auth0, or Azure AD configured with a client application for testing. For this guide, we'll assume a generic OIDC provider configuration.
1. The Microservices Security Challenge
Securing a single monolithic application is relatively straightforward. All components run within the same process, sharing a security context. In a microservices architecture, however, requests often traverse multiple services, each potentially requiring its own authentication and authorization logic.
Key challenges include:
- Distributed Authentication: How does a user authenticate once and have that identity recognized across multiple services?
- Distributed Authorization: How do services determine if a user (or another service) is authorized to perform an action, especially when authorization rules might vary?
- Inter-service Communication: How do microservices securely communicate with each other without a human user in the loop?
- Token Management: How are access tokens issued, validated, refreshed, and revoked across a distributed system?
- Complexity: Implementing custom security solutions for each service can lead to inconsistencies, vulnerabilities, and high maintenance costs.
OAuth 2.1 and OIDC provide a standardized, robust solution to these challenges by centralizing identity and access management with an external Authorization Server.
2. OAuth 2.1: The Authorization Framework
OAuth 2.1 is an authorization framework that enables an application (the Client) to obtain limited access to an HTTP service (the Resource Server) on behalf of a user (the Resource Owner). It's crucial to understand that OAuth 2.1 is not an authentication protocol; it's about granting permissions.
Key roles in OAuth 2.1:
- Resource Owner: The entity capable of granting access to a protected resource (usually the user).
- Client: The application requesting access to a protected resource on behalf of the Resource Owner.
- Authorization Server: The server that authenticates the Resource Owner and issues access tokens to the Client.
- Resource Server: The server hosting the protected resources, capable of accepting and responding to protected resource requests using access tokens.
Authorization Code Flow with PKCE: For microservices, especially those involving user interaction (e.g., a frontend application or API Gateway acting as a client), the Authorization Code Flow with Proof Key for Code Exchange (PKCE) is the recommended standard. PKCE mitigates the risk of authorization code interception, making it secure even for public clients (like single-page applications or mobile apps) that cannot keep a client secret confidential.
OAuth 2.1 mandates PKCE for all clients, tightens redirect URI validation, and simplifies refresh token management with sender-constrained and rotated refresh tokens, enhancing overall security over OAuth 2.0.
3. OpenID Connect: Identity on Top of OAuth 2.1
While OAuth 2.1 handles authorization, it doesn't provide a standardized way to verify the identity of the end-user. This is where OpenID Connect (OIDC) comes in. OIDC is an identity layer built on top of OAuth 2.1, allowing clients to verify the identity of the end-user based on the authentication performed by an Authorization Server, as well as to obtain basic profile information about the end-user.
The core of OIDC is the ID Token. This is a JSON Web Token (JWT) that contains claims (assertions) about the authentication event and the user. Common claims include:
iss: Issuer (who issued the token)sub: Subject (unique identifier for the user)aud: Audience (who the token is intended for)exp: Expiration timeiat: Issued at timepreferred_username,email,name, etc. (user profile information)
OIDC also defines the UserInfo Endpoint, an OAuth 2.1 protected resource that returns claims about the authenticated end-user. This allows clients to retrieve additional profile information beyond what's in the ID Token.
In a microservices context, OIDC provides the mechanism for a user to log in once (SSO) with the Authorization Server, and then the ID Token (for identity) and Access Token (for authorization) can be used across various microservices.
4. Spring Security's Role in OAuth 2.1/OIDC
Spring Security, especially version 6 and above, provides comprehensive support for both OAuth 2.1 clients and resource servers. It abstracts away much of the complexity, allowing developers to focus on application logic.
Key Spring Security modules for OAuth 2.1/OIDC:
spring-security-oauth2-client: This module enables your Spring Boot application to act as an OAuth 2.1/OIDC client. It handles the Authorization Code Flow, token exchange, and user information retrieval.spring-security-oauth2-resource-server: This module enables your Spring Boot application to act as an OAuth 2.1 resource server. It handles the validation of JWT access tokens, allowing you to secure your API endpoints.
By leveraging these modules, Spring Security automatically configures necessary filters, authentication providers, and converters to integrate with your chosen OIDC provider.
5. Setting Up an OIDC Client (Frontend/Gateway)
Let's configure a Spring Boot application to act as an OIDC client. This could be a traditional web application, a Single Page Application (SPA) backend, or an API Gateway responsible for initiating the login flow.
First, add the necessary dependency to your pom.xml:
<dependency>
    <groupId>org.springframework.boot</groupId>
    <artifactId>spring-boot-starter-oauth2-client</artifactId>
</dependency>
<dependency>
    <groupId>org.springframework.boot</groupId>
    <artifactId>spring-boot-starter-web</artifactId>
</dependency>
<dependency>
    <groupId>org.springframework.boot</groupId>
    <artifactId>spring-boot-starter-security</artifactId>
</dependency>
Next, configure your OIDC provider in application.yml:
# src/main/resources/application.yml
spring:
  security:
    oauth2:
      client:
        registration:
          # 'my-oidc-provider' is an arbitrary client registration ID
          my-oidc-provider:
            client-id: your-client-id
            client-secret: your-client-secret # Only for confidential clients
            authorization-grant-type: authorization_code
            redirect-uri: "{baseUrl}/login/oauth2/code/{registrationId}"
            scope: openid,profile,email,roles # Request necessary scopes
            client-name: My Awesome Client
        provider:
          my-oidc-provider:
            issuer-uri: https://your-oidc-provider.com/realms/your-realm # e.g., Keycloak issuer URI

server:
  port: 8080
Explanation of configuration:
client-idandclient-secret: Obtained from your OIDC provider.client-secretis only needed if your client application is confidential (can securely store a secret), otherwise, PKCE alone is sufficient.authorization-grant-type: Must beauthorization_codefor user-facing applications.redirect-uri: This is where the Authorization Server sends the user back after successful authentication. Spring Security provides a default template:{baseUrl}/login/oauth2/code/{registrationId}.scope: Defines the permissions the client is requesting.openidis mandatory for OIDC.profile,email, androlesare common custom scopes.issuer-uri: The base URI of your OIDC provider. Spring Security will use this to discover all other OIDC endpoints (authorization, token, jwks, userinfo) via the.well-known/openid-configurationendpoint.
Now, let's create a simple SecurityFilterChain and a controller:
// src/main/java/com/example/client/SecurityConfig.java
package com.example.client;

import org.springframework.context.annotation.Bean;
import org.springframework.context.annotation.Configuration;
import org.springframework.security.config.annotation.web.builders.HttpSecurity;
import org.springframework.security.config.annotation.web.configuration.EnableWebSecurity;
import org.springframework.security.web.SecurityFilterChain;

@Configuration
@EnableWebSecurity
public class SecurityConfig {

    @Bean
    public SecurityFilterChain securityFilterChain(HttpSecurity http) throws Exception {
        http
            .authorizeHttpRequests(authorize -> authorize
                .requestMatchers("/", "/public").permitAll()
                .anyRequest().authenticated()
            )
            .oauth2Login(oauth2Login -> oauth2Login
                .loginPage("/oauth2/authorization/my-oidc-provider") // Optional: custom login page redirect
            )
            .oauth2Client(); // Enables OAuth2 client features like WebClient customization
        return http.build();
    }
}// src/main/java/com/example/client/WebController.java
package com.example.client;
import org.springframework.security.core.annotation.AuthenticationPrincipal;
import org.springframework.security.oauth2.core.oidc.user.OidcUser;
import org.springframework.stereotype.Controller;
import org.springframework.ui.Model;
import org.springframework.web.bind.annotation.GetMapping;
@Controller
public class WebController {
@GetMapping("/")
public String home(Model model, @AuthenticationPrincipal OidcUser oidcUser) {
if (oidcUser != null) {
model.addAttribute("userName", oidcUser.getFullName());
model.addAttribute("email", oidcUser.getEmail());
model.addAttribute("idToken", oidcUser.getIdToken().getTokenValue());
model.addAttribute("accessToken", oidcUser.getAccessToken().getTokenValue());
} else {
model.addAttribute("userName", "Guest");
}
return "home"; // Assuming you have a 'home.html' Thymeleaf template
}
@GetMapping("/secure")
public String securePage(Model model, @AuthenticationPrincipal OidcUser oidcUser) {
model.addAttribute("userName", oidcUser.getFullName());
model.addAttribute("roles", oidcUser.getAuthorities());
return "secure"; // Assuming 'secure.html'
}
}When a user tries to access a secured endpoint (e.g., /secure), Spring Security will redirect them to the OIDC provider's login page. After successful authentication, the user is redirected back to /login/oauth2/code/my-oidc-provider, and Spring Security handles the token exchange and user principal creation.
6. Securing a Resource Server (Microservice)
Now, let's configure a microservice to act as a Resource Server, validating the JWT access tokens issued by the OIDC provider.
Add the necessary dependency to your pom.xml:
<dependency>
    <groupId>org.springframework.boot</groupId>
    <artifactId>spring-boot-starter-oauth2-resource-server</artifactId>
</dependency>
<dependency>
    <groupId>org.springframework.boot</groupId>
    <artifactId>spring-boot-starter-web</artifactId>
</dependency>
<dependency>
    <groupId>org.springframework.boot</groupId>
    <artifactId>spring-boot-starter-security</artifactId>
</dependency>
Configure the resource server in application.yml:
# src/main/resources/application.yml
spring:
  security:
    oauth2:
      resourceserver:
        jwt:
          issuer-uri: https://your-oidc-provider.com/realms/your-realm # Same issuer as client
          # jwk-set-uri: https://your-oidc-provider.com/realms/your-realm/protocol/openid-connect/certs # Optional, derived from issuer-uri

server:
  port: 8081 # Different port than the client application
Explanation of configuration:
issuer-uri: The URI of the Authorization Server that issued the JWT. Spring Security uses this to fetch the JSON Web Key Set (JWKS) endpoint (typically/.well-known/jwks.jsonor/.well-known/openid-configurationthenjwks_uri) to retrieve the public keys needed to verify the JWT's signature.
Now, configure the SecurityFilterChain for the resource server:
// src/main/java/com/example/resourceserver/SecurityConfig.java
package com.example.resourceserver;

import org.springframework.context.annotation.Bean;
import org.springframework.context.annotation.Configuration;
import org.springframework.security.config.annotation.web.builders.HttpSecurity;
import org.springframework.security.config.annotation.web.configuration.EnableWebSecurity;
import org.springframework.security.web.SecurityFilterChain;

@Configuration
@EnableWebSecurity
public class SecurityConfig {

    @Bean
    public SecurityFilterChain securityFilterChain(HttpSecurity http) throws Exception {
        http
            .authorizeHttpRequests(authorize -> authorize
                .requestMatchers("/api/public").permitAll()
                .anyRequest().authenticated()
            )
            .oauth2ResourceServer(oauth2ResourceServer -> oauth2ResourceServer
                .jwt(jwt -> jwt.issuerUri("https://your-oidc-provider.com/realms/your-realm")) // Configure the issuer URI
            );
        return http.build();
    }
}
And a simple REST controller:
// src/main/java/com/example/resourceserver/ResourceController.java
package com.example.resourceserver;

import org.springframework.security.core.annotation.AuthenticationPrincipal;
import org.springframework.security.oauth2.jwt.Jwt;
import org.springframework.web.bind.annotation.GetMapping;
import org.springframework.web.bind.annotation.RestController;

@RestController
public class ResourceController {

    @GetMapping("/api/hello")
    public String hello(@AuthenticationPrincipal Jwt jwt) {
        return String.format("Hello, %s! Your user ID is %s",
                jwt.getClaimAsString("preferred_username"),
                jwt.getSubject());
    }

    @GetMapping("/api/public")
    public String publicEndpoint() {
        return "This is a public endpoint.";
    }
}
Now, any request to /api/hello must include a valid JWT access token in the Authorization: Bearer <token> header. Spring Security will automatically validate the token's signature, expiry, issuer, and audience (if configured).
7. Role-Based Access Control (RBAC) with OIDC Scopes and Claims
For fine-grained authorization, you'll want to map roles or permissions from your OIDC provider into Spring Security authorities. OIDC providers often include roles/groups as custom claims within the Access Token (or ID Token, though Access Token is preferred for authorization).
First, ensure your OIDC client requests the roles or groups scope, and your OIDC provider is configured to issue these claims.
Next, customize the JwtAuthenticationConverter on your resource server to extract these claims and map them to Spring Security GrantedAuthority objects:
// src/main/java/com/example/resourceserver/SecurityConfig.java (updated)
package com.example.resourceserver;

import org.springframework.context.annotation.Bean;
import org.springframework.context.annotation.Configuration;
import org.springframework.security.config.annotation.method.configuration.EnableMethodSecurity;
import org.springframework.security.config.annotation.web.builders.HttpSecurity;
import org.springframework.security.config.annotation.web.configuration.EnableWebSecurity;
import org.springframework.security.core.GrantedAuthority;
import org.springframework.security.core.authority.SimpleGrantedAuthority;
import org.springframework.security.oauth2.server.resource.authentication.JwtAuthenticationConverter;
import org.springframework.security.oauth2.server.resource.authentication.JwtGrantedAuthoritiesConverter;
import org.springframework.security.web.SecurityFilterChain;

import java.util.Collection;
import java.util.Collections;
import java.util.stream.Collectors;

@Configuration
@EnableWebSecurity
@EnableMethodSecurity // Enable @PreAuthorize, @PostAuthorize, etc.
public class SecurityConfig {

    @Bean
    public SecurityFilterChain securityFilterChain(HttpSecurity http) throws Exception {
        http
            .authorizeHttpRequests(authorize -> authorize
                .requestMatchers("/api/public").permitAll()
                .anyRequest().authenticated()
            )
            .oauth2ResourceServer(oauth2ResourceServer -> oauth2ResourceServer
                .jwt(jwt -> jwt
                    .issuerUri("https://your-oidc-provider.com/realms/your-realm")
                    .jwtAuthenticationConverter(jwtAuthenticationConverter()) // Custom converter
                )
            );
        return http.build();
    }

    @Bean
    public JwtAuthenticationConverter jwtAuthenticationConverter() {
        JwtGrantedAuthoritiesConverter grantedAuthoritiesConverter = new JwtGrantedAuthoritiesConverter();
        // Optionally set the authority prefix, e.g., "ROLE_"
        // grantedAuthoritiesConverter.setAuthorityPrefix("ROLE_");
        // Optionally set the claim name for scopes, e.g., "scope" or "scp"
        // grantedAuthoritiesConverter.setAuthoritiesClaimName("scope");

        JwtAuthenticationConverter jwtConverter = new JwtAuthenticationConverter();
        jwtConverter.setJwtGrantedAuthoritiesConverter(jwt -> {
            Collection<GrantedAuthority> authorities = grantedAuthoritiesConverter.convert(jwt);
            // Extract custom roles/groups claim (e.g., from 'roles' or 'groups' claim)
            if (jwt.hasClaim("roles")) {
                Collection<String> roles = jwt.getClaimAsStringList("roles");
                if (roles != null) {
                    authorities.addAll(roles.stream()
                        .map(role -> new SimpleGrantedAuthority("ROLE_" + role.toUpperCase()))
                        .collect(Collectors.toList()));
                }
            } else if (jwt.hasClaim("groups")) { // Example for 'groups' claim
                Collection<String> groups = jwt.getClaimAsStringList("groups");
                if (groups != null) {
                    authorities.addAll(groups.stream()
                        .map(group -> new SimpleGrantedAuthority("ROLE_" + group.toUpperCase()))
                        .collect(Collectors.toList()));
                }
            }
            return authorities;
        });
        return jwtConverter;
    }
}
Now, you can use annotation-based security in your controllers:
// src/main/java/com/example/resourceserver/ResourceController.java (updated)
package com.example.resourceserver;

import org.springframework.security.access.prepost.PreAuthorize;
import org.springframework.security.core.annotation.AuthenticationPrincipal;
import org.springframework.security.oauth2.jwt.Jwt;
import org.springframework.web.bind.annotation.GetMapping;
import org.springframework.web.bind.annotation.RestController;

@RestController
public class ResourceController {

    @GetMapping("/api/hello")
    @PreAuthorize("hasRole('USER')") // Requires a user with 'USER' role
    public String hello(@AuthenticationPrincipal Jwt jwt) {
        return String.format("Hello, %s! Your user ID is %s. You are a %s.",
                jwt.getClaimAsString("preferred_username"),
                jwt.getSubject(),
                jwt.getClaimAsStringList("roles"));
    }

    @GetMapping("/api/admin")
    @PreAuthorize("hasRole('ADMIN')") // Requires a user with 'ADMIN' role
    public String adminOnly(@AuthenticationPrincipal Jwt jwt) {
        return String.format("Welcome, Admin %s!", jwt.getClaimAsString("preferred_username"));
    }

    @GetMapping("/api/public")
    public String publicEndpoint() {
        return "This is a public endpoint.";
    }
}
8. Token Propagation and Client Credentials Flow
In a microservices architecture, services often need to communicate with each other. There are two primary scenarios:
-
Token Propagation (On-Behalf-Of Flow): When a user initiates a request to Service A, and Service A needs to call Service B on behalf of that same user. In this case, Service A should propagate the original user's access token (or a new token derived from it, if the OIDC provider supports it) to Service B.
The simplest way to achieve this is by forwarding the
Authorizationheader. Spring'sWebClientcan be configured to do this:java// Example of calling another service with the current user's token package com.example.servicea; import org.springframework.security.oauth2.client.OAuth2AuthorizeRequest; import org.springframework.security.oauth2.client.OAuth2AuthorizedClientManager; import org.springframework.security.oauth2.client.authentication.OAuth2AuthenticationToken; import org.springframework.stereotype.Service; import org.springframework.web.reactive.function.client.WebClient; @Service public class ServiceBCaller { private final WebClient webClient; private final OAuth2AuthorizedClientManager authorizedClientManager; public ServiceBCaller(WebClient.Builder webClientBuilder, OAuth2AuthorizedClientManager authorizedClientManager) { this.webClient = webClientBuilder.baseUrl("http://localhost:8082").build(); // Service B URL this.authorizedClientManager = authorizedClientManager; } public String callServiceB(OAuth2AuthenticationToken authentication) { // Option 1: Directly use the current user's access token if it's sufficient for Service B String accessToken = authentication.getPrincipal().getAttribute("access_token"); // Option 2: If you need to refresh the token or get a new one for a specific scope, // use authorizedClientManager. This is more complex and often not needed for direct propagation. // For simplicity, we'll assume direct propagation is sufficient if Service B accepts the same token. return webClient.get() .uri("/api/resource-from-b") .headers(headers -> headers.setBearerAuth(accessToken)) .retrieve() .bodyToMono(String.class) .block(); } }Note: The
OAuth2AuthenticationTokencan be injected into a controller method, and its principal will contain theOAuth2UserorOidcUserfrom which you can get the access token. However, if the token is short-lived and you need refresh, a more sophisticated approach involvingOAuth2AuthorizedClientManagermight be needed, often configured with aJwtBearerGrantRequestEntityConverterif your OIDC provider supports token exchange (RFC 8693). For most scenarios, direct propagation of the original token is adequate if all services trust the same issuer and audience. -
Client Credentials Flow (System-to-System): When a microservice needs to call another microservice without any user context (e.g., a background job, a scheduled task, or a service calling an infrastructure service). In this scenario, the calling service acts as its own client and obtains an access token directly from the Authorization Server using its
client-idandclient-secret.First, configure a new client registration for the client credentials flow in
application.ymlfor the calling service:yaml# src/main/resources/application.yml for Service A (calling Service B) spring: security: oauth2: client: registration: service-b-client: client-id: service-a-client-id client-secret: service-a-client-secret authorization-grant-type: client_credentials scope: serviceb.read,serviceb.write provider: service-b-client: issuer-uri: https://your-oidc-provider.com/realms/your-realmThen, use
WebClientconfigured withoauth2Clientto automatically manage tokens:java// src/main/java/com/example/servicea/ServiceBCallerClientCredentials.java package com.example.servicea; import org.springframework.context.annotation.Bean; import org.springframework.context.annotation.Configuration; import org.springframework.security.oauth2.client.AuthorizedClientServiceOAuth2AuthorizedClientManager; import org.springframework.security.oauth2.client.OAuth2AuthorizedClientManager; import org.springframework.security.oauth2.client.OAuth2AuthorizedClientProvider; import org.springframework.security.oauth2.client.OAuth2AuthorizedClientProviderBuilder; import org.springframework.security.oauth2.client.registration.ClientRegistrationRepository; import org.springframework.security.oauth2.client.web.DefaultOAuth2AuthorizedClientManager; import org.springframework.security.oauth2.client.web.OAuth2AuthorizedClientRepository; import org.springframework.web.reactive.function.client.WebClient; @Configuration public class WebClientConfig { @Bean public OAuth2AuthorizedClientManager authorizedClientManager(ClientRegistrationRepository clientRegistrationRepository, OAuth2AuthorizedClientRepository authorizedClientRepository) { OAuth2AuthorizedClientProvider authorizedClientProvider = OAuth2AuthorizedClientProviderBuilder.builder() .clientCredentials() .build(); DefaultOAuth2AuthorizedClientManager authorizedClientManager = new DefaultOAuth2AuthorizedClientManager( clientRegistrationRepository, authorizedClientRepository); authorizedClientManager.setAuthorizedClientProvider(authorizedClientProvider); return authorizedClientManager; } @Bean WebClient webClient(OAuth2AuthorizedClientManager authorizedClientManager) { // The 'service-b-client' corresponds to the client registration ID in application.yml return WebClient.builder() .baseUrl("http://localhost:8082") // Target service B URL .apply(oauth2Client.oauth2Configuration(authorizedClientManager)) .build(); } } // src/main/java/com/example/servicea/ServiceBCallerClientCredentials.java package com.example.servicea; import org.springframework.security.oauth2.client.web.reactive.function.client.ServletOAuth2AuthorizedClientExchangeFilterFunction; import org.springframework.stereotype.Service; import org.springframework.web.reactive.function.client.WebClient; @Service public class ServiceBCallerClientCredentials { private final WebClient webClient; public ServiceBCallerClientCredentials(WebClient webClient) { this.webClient = webClient; } public String callServiceBAsService() { return webClient.get() .uri("/api/internal-resource") .attributes(ServletOAuth2AuthorizedClientExchangeFilterFunction.clientRegistrationId("service-b-client")) .retrieve() .bodyToMono(String.class) .block(); } }On Service B, you would configure it as a resource server (as in Section 6), and potentially add
@PreAuthorize("hasAuthority('SCOPE_serviceb.read')")or similar to protect the internal resource, ensuring only tokens with the correct client credentials scope can access it.
9. Best Practices for Microservices Security
- Always use HTTPS/TLS: All communication between clients, microservices, and the Authorization Server must be encrypted.
- Validate all Tokens: Resource servers must always validate the JWT's signature, expiry, issuer (
iss), and audience (aud). Spring Security does this automatically when configured correctly. - Short-lived Access Tokens, Long-lived Refresh Tokens: Access tokens should have a short lifespan (e.g., 5-15 minutes) to minimize the impact of compromise. Refresh tokens, used to obtain new access tokens without user re-authentication, can be longer-lived but should be rotated and sender-constrained (OAuth 2.1).
- Scope Down Permissions: Request and grant only the minimum necessary scopes/permissions for each client and user.
- Centralized Identity Provider: Use a dedicated, robust OIDC provider (e.g., Keycloak, Okta, Auth0) for managing identities and issuing tokens.
- Logging and Monitoring: Implement comprehensive logging of security events (login attempts, token issuance/validation failures) and monitor your Authorization Server and microservices for suspicious activity.
- PKCE for all Clients: OAuth 2.1 mandates PKCE for all clients, including confidential ones, adding an extra layer of protection against authorization code interception.
- Never use ID Token for Authorization: The ID Token is for authentication (verifying user identity), not authorization. Always use the Access Token for authorizing access to resources.
- Secure Client Secrets: If using confidential clients, store client secrets securely (e.g., environment variables, secret management services) and never commit them to source control.
10. Common Pitfalls and Troubleshooting
- Misconfigured
issuer-uriorjwk-set-uri: Ensure these URIs correctly point to your OIDC provider. A common mistake is using the wrong realm or tenant URI. - Incorrect
aud(Audience) Claim: If your resource server is configured with a specific audience (e.g.,spring.security.oauth2.resourceserver.jwt.audience), and the incoming access token doesn't contain thataudclaim, validation will fail. - Expired Tokens: JWTs have an
expclaim. If the token is expired, the resource server will reject it. Ensure your client application refreshes tokens appropriately. - Missing Scopes/Roles: If an endpoint is protected by
@PreAuthorize("hasRole('ADMIN')")but the access token doesn't contain the corresponding role claim, access will be denied. Verify your OIDC provider issues the correct claims and yourJwtAuthenticationConvertermaps them correctly. - CORS Issues: When your client (e.g., a SPA) and resource server are on different origins, you'll likely encounter Cross-Origin Resource Sharing (CORS) errors. Configure CORS appropriately on your resource servers.
- Using ID Token for Authorization: As mentioned, ID tokens are for identity. Resource servers should validate and use claims from the Access Token for authorization decisions.
- No HTTPS: Running OAuth/OIDC over plain HTTP is a major security vulnerability.
- Client Secret Exposure: Never hardcode or commit client secrets to public repositories.
To troubleshoot, enable Spring Security debug logging (logging.level.org.springframework.security: DEBUG) to get detailed information on token validation, authentication, and authorization decisions.
Conclusion
Securing microservices with OAuth 2.1 and OpenID Connect in Spring Security provides a powerful, standardized, and scalable solution to the complex challenges of distributed system security. By centralizing authentication and leveraging JWT-based access tokens, you can ensure robust authorization across your services.
Spring Security's comprehensive support for both OAuth 2.1 clients and resource servers significantly simplifies implementation, allowing developers to focus on business logic while maintaining high security standards. Embrace these patterns, adhere to best practices, and continuously monitor your security posture to build resilient and secure microservice applications.
As you evolve, consider exploring advanced topics like mTLS for service-to-service authentication, fine-grained authorization policies with external policy engines (e.g., OPA), and integrating with API gateways for centralized token enforcement.
Written by
CodewithYohaFull-Stack Software Engineer with 7+ years of experience in Java, Spring Boot, and cloud architecture across AWS, Azure, and GCP. Writing production-grade engineering patterns for developers who ship real software.