Introduction
In the fast-paced world of modern software development, Continuous Integration and Continuous Delivery (CI/CD) pipelines are the backbone of efficient release cycles. They automate everything from code compilation and testing to deployment. However, these powerful pipelines often require access to sensitive information—secrets—such as API keys, database credentials, cloud provider access tokens, and private repository keys. Historically, the most common method for managing these secrets in CI/CD has been through environment variables.
While seemingly convenient, storing secrets as environment variables within CI/CD systems introduces significant security risks. These risks range from accidental exposure in logs and build artifacts to the challenges of secure rotation and the inherent lack of fine-grained access control. As our infrastructure becomes more distributed and our security posture more stringent, relying on long-lived, static credentials passed via environment variables is no longer a viable or secure practice.
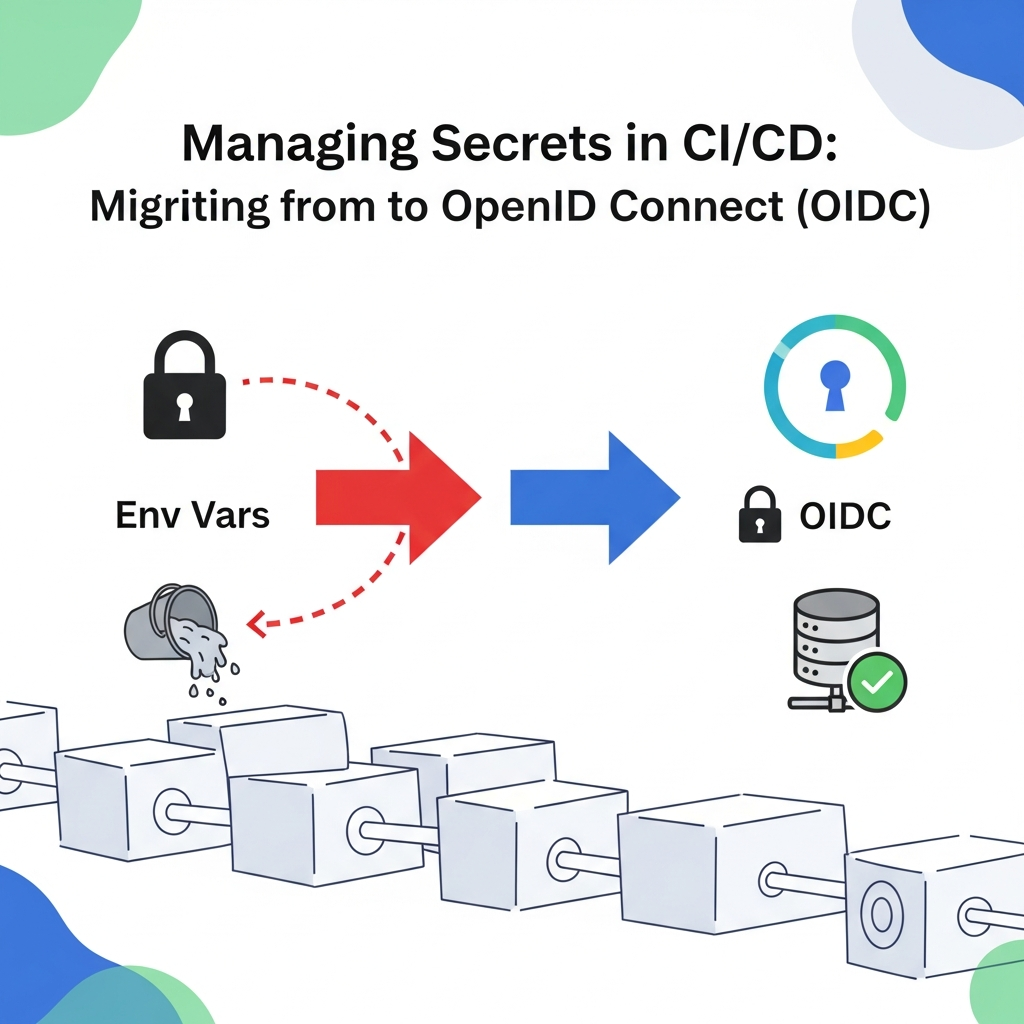
This guide will walk you through a crucial migration: moving away from environment variables for secret management and embracing OpenID Connect (OIDC). OIDC provides a secure, identity-based approach that allows your CI/CD pipelines to authenticate directly with cloud providers and secret managers, obtaining short-lived, ephemeral credentials without ever exposing long-lived secrets. We'll explore the 'why' and the 'how', providing practical examples for major CI/CD platforms like GitHub Actions, GitLab CI, and Azure DevOps, integrated with leading cloud providers such as AWS, GCP, and Azure.
Prerequisites
To get the most out of this guide, you should have:
- A basic understanding of CI/CD concepts and how pipelines work.
- Familiarity with managing environment variables in your chosen CI/CD platform.
- An awareness of Identity and Access Management (IAM) principles in at least one major cloud provider (AWS, Azure, or GCP).
- Basic knowledge of command-line interfaces (CLI) for cloud providers.
The Problem with Environment Variables for Secrets
Before diving into OIDC, it's critical to understand why environment variables fall short as a secure secret management solution:
- Lack of Fine-Grained Access Control: Environment variables are typically scoped to an entire job or pipeline. It's challenging to grant a job access to only the specific secrets it needs, leading to over-privileged access.
- Risk of Accidental Exposure: Secrets can inadvertently leak through various channels:
- Logs: If not carefully masked, secrets can appear in build logs, making them visible to anyone with log access.
- Forked Repositories/Pull Requests: In open-source projects or collaborative environments, malicious actors could craft PRs to print environment variables.
- Build Artifacts: Secrets might accidentally be embedded in compiled code or configuration files that become part of deployable artifacts.
- Shell History: Manual debugging involving echoing variables can leave traces.
- Complex Rotation and Lifecycle Management: Long-lived API keys or credentials stored as environment variables require manual rotation. This process is often cumbersome, error-prone, and can lead to service disruptions if not coordinated perfectly. Storing them directly means they persist until explicitly changed.
- No Audit Trail for Secret Usage: While CI/CD platforms log job execution, they typically don't provide detailed audit trails of when and by whom a specific secret was accessed or used within a job.
- Bootstrap Problem with Secret Managers: Even if you use a dedicated secret manager (like HashiCorp Vault or AWS Secrets Manager), you still need an initial secret (e.g., an API token or access key) to authenticate your CI/CD pipeline to the secret manager. This initial secret often ends up as an environment variable, reintroducing the same vulnerabilities.
These issues compound, making environment variables a significant attack vector in your CI/CD pipeline. A more robust solution is required.
Introduction to OpenID Connect (OIDC)
OpenID Connect (OIDC) is an authentication layer built on top of the OAuth 2.0 framework. While OAuth 2.0 is about authorization (granting access to resources), OIDC is about authentication (verifying identity). It allows clients to verify the identity of the end-user based on the authentication performed by an authorization server and to obtain basic profile information about the end-user in an interoperable and REST-like manner.
For machine identities, like CI/CD pipelines, OIDC enables a secure, token-based authentication flow. Instead of using long-lived static credentials, your CI/CD pipeline acts as an OIDC client, requesting an identity token (a JSON Web Token, or JWT) from its CI/CD provider (which acts as an OIDC Identity Provider). This JWT is then presented to a cloud provider or secret manager (which acts as an OIDC Relying Party or Service Provider), which verifies the token's authenticity and grants temporary access based on predefined trust policies.
The key benefits of OIDC for CI/CD secret management are:
- No Long-Lived Secrets: Your CI/CD system never stores or handles long-lived cloud credentials. It only uses a short-lived OIDC token.
- Ephemeral Credentials: The cloud provider issues temporary, session-based credentials (e.g., AWS IAM temporary credentials, GCP short-lived access tokens) that are valid for a very limited time (minutes to hours).
- Fine-Grained Access Control: Trust policies can be highly specific, allowing you to define exactly which repositories, branches, or even specific CI/CD jobs can assume a particular role or identity.
- Improved Auditability: Cloud providers log the assumption of roles/identities, providing a clear audit trail.
Core Concepts: Identity Providers (IdP) and Service Providers (SP)
To understand OIDC in the context of CI/CD, it's essential to grasp the roles of the Identity Provider (IdP) and the Service Provider (SP):
-
Identity Provider (IdP): This is the entity that authenticates the user or machine and issues an identity token (JWT). In our CI/CD scenario, the IdP is your CI/CD platform (e.g., GitHub Actions, GitLab CI, Azure DevOps). When a CI/CD job runs, the IdP generates a unique, cryptographically signed JWT for that specific job.
-
Service Provider (SP) / Relying Party (RP): This is the entity that trusts the IdP, receives the JWT, validates it, and then grants access to its resources based on the claims within the JWT and its own access policies. In our scenario, the SP is typically your cloud provider (e.g., AWS IAM, Azure AD, GCP Workload Identity Federation) or a secret manager (e.g., HashiCorp Vault, Doppler).
The communication flow is as follows:
- A CI/CD job starts on the IdP (e.g., GitHub Actions).
- The IdP generates a JWT containing claims specific to that job (e.g., repository name, branch, workflow ID, issuer URL). This JWT is automatically made available to the job.
- The CI/CD job uses this JWT to authenticate with the SP (e.g., AWS IAM).
- The SP receives the JWT, verifies its signature against the IdP's public keys, and checks the claims within the JWT against its own configured trust policy.
- If the JWT is valid and the claims match the trust policy, the SP grants temporary credentials (e.g., an IAM role session) to the CI/CD job.
- The CI/CD job then uses these temporary credentials to perform actions on the SP's resources.
This entire process happens without any long-lived secrets ever being exposed to the CI/CD environment.
Section 1: OIDC in GitHub Actions with AWS IAM
GitHub Actions can act as an OIDC Identity Provider, issuing JWTs that AWS IAM can trust. This allows your GitHub Actions workflows to assume IAM roles without storing AWS access keys.
Step 1: Configure an OIDC Provider in AWS IAM
First, you need to tell AWS that GitHub's OIDC issuer is a trusted identity provider.
- Go to the AWS IAM console -> Identity Providers -> Add provider.
- Select "OpenID Connect".
- Provider URL:
https://token.actions.githubusercontent.com - Audience:
sts.amazonaws.com(This is the standard audience for AWS STS operations) - Click "Add provider".
Step 2: Create an IAM Role with a Trust Policy
Now, create an IAM role that your GitHub Actions workflow will assume. The crucial part is the trust policy, which defines who can assume this role.
{
  "Version": "2012-10-17",
  "Statement": [
    {
      "Effect": "Allow",
      "Principal": {
        "Federated": "arn:aws:iam::YOUR_AWS_ACCOUNT_ID:oidc-provider/token.actions.githubusercontent.com"
      },
      "Action": "sts:AssumeRoleWithWebIdentity",
      "Condition": {
        "StringEquals": {
          "token.actions.githubusercontent.com:aud": "sts.amazonaws.com"
        },
        "StringLike": {
          "token.actions.githubusercontent.com:sub": [
            "repo:YOUR_GITHUB_ORG/YOUR_REPO:ref:refs/heads/main",
            "repo:YOUR_GITHUB_ORG/YOUR_REPO:environment:production"
          ]
        }
      }
    }
  ]
}
Explanation of the Trust Policy:
"Federated": "arn:aws:iam::YOUR_AWS_ACCOUNT_ID:oidc-provider/token.actions.githubusercontent.com": This specifies that the principal allowed to assume this role is federated through the GitHub OIDC provider you configured."Action": "sts:AssumeRoleWithWebIdentity": This is the specific AWS STS action for assuming a role using a web identity token."Condition":"token.actions.githubusercontent.com:aud": "sts.amazonaws.com": This ensures the JWT'saud(audience) claim matchessts.amazonaws.com, confirming the token is intended for AWS STS."token.actions.githubusercontent.com:sub": This is where fine-grained control comes in. Thesub(subject) claim in GitHub's JWT identifies the specific workflow context. You can match it to:"repo:YOUR_GITHUB_ORG/YOUR_REPO:ref:refs/heads/main": Allows only workflows running on themainbranch of a specific repository."repo:YOUR_GITHUB_ORG/YOUR_REPO:environment:production": Allows only workflows deployed to a specific GitHub Environment (e.g.,production).
Attach the necessary permissions policies (e.g., AmazonS3FullAccess, AmazonEC2ContainerRegistryPowerUser) to this IAM role.
Step 3: Update Your GitHub Actions Workflow
Modify your workflow to use the aws-actions/configure-aws-credentials action, which automatically handles OIDC token exchange.
name: Deploy to AWS

on:
  push:
    branches:
      - main

env:
  AWS_REGION: us-east-1

jobs:
  deploy:
    runs-on: ubuntu-latest
    permissions:
      id-token: write # This is crucial: grants permission to fetch the OIDC token
      contents: read

    steps:
      - name: Checkout code
        uses: actions/checkout@v4

      - name: Configure AWS Credentials
        uses: aws-actions/configure-aws-credentials@v4
        with:
          role-to-assume: arn:aws:iam::YOUR_AWS_ACCOUNT_ID:role/YourGitHubActionsRole # The ARN of the IAM role created above
          aws-region: ${{ env.AWS_REGION }}
          role-session-name: GitHubActionsSession # Optional: A descriptive name for the assumed role session

      - name: Deploy application (example: Sync S3)
        run: |
          aws s3 sync ./dist s3://your-s3-bucket-name --delete
          aws cloudfront create-invalidation --distribution-id YOUR_CLOUDFRONT_DISTRIBUTION_ID --paths "/*"
Key points:
permissions: id-token: write: This is a new permission required for GitHub Actions to fetch the OIDC token. Without it, theconfigure-aws-credentialsaction won't work.role-to-assume: The ARN of the IAM role you created.- The
aws-actions/configure-aws-credentialsaction handles the exchange of the GitHub OIDC token for temporary AWS credentials, which are then automatically configured as environment variables (AWS_ACCESS_KEY_ID,AWS_SECRET_ACCESS_KEY,AWS_SESSION_TOKEN) for subsequent steps.
Section 2: OIDC in GitLab CI with GCP Workload Identity Federation
GitLab CI also supports OIDC, allowing pipelines to authenticate with Google Cloud using Workload Identity Federation. This eliminates the need for long-lived service account keys.
Step 1: Enable Workload Identity Federation in GCP
Workload Identity Federation allows external identities (like GitLab CI) to authenticate as Google Cloud service accounts. You need to create a Workload Identity Pool and a Workload Identity Provider within that pool.
-
Create a Workload Identity Pool: This is a container for identity providers.
bashgcloud iam workload-identity-pools create "gitlab-ci-pool" \ --project="YOUR_GCP_PROJECT_ID" \ --location="global" \ --display-name="GitLab CI Pool"Note the pool ID:
projects/YOUR_GCP_PROJECT_NUMBER/locations/global/workloadIdentityPools/gitlab-ci-pool. -
Create a Workload Identity Provider: This specifies GitLab as the OIDC IdP.
bashgcloud iam workload-identity-pools providers create-oidc "gitlab-ci-provider" \ --project="YOUR_GCP_PROJECT_ID" \ --location="global" \ --workload-identity-pool="gitlab-ci-pool" \ --display-name="GitLab CI Provider" \ --attribute-mapping="google.subject=assertion.sub,attribute.project_path=assertion.project_path" \ --issuer-uri="https://gitlab.com" \ --attribute-condition="attribute.project_path==\"YOUR_GITLAB_GROUP/YOUR_PROJECT\""Explanation:
--issuer-uri="https://gitlab.com": The OIDC issuer URL for GitLab.--attribute-mapping: Maps claims from the GitLab JWT to Google Cloud attributes.assertion.sub(GitLab's unique job ID) is mapped togoogle.subject.assertion.project_path(e.g.,my-group/my-project) is mapped to a custom attribute.--attribute-condition: Crucial for security. This condition ensures that only JWTs from a specific GitLab project path (e.g.,YOUR_GITLAB_GROUP/YOUR_PROJECT) are accepted. You can make this more granular if needed.
Note the provider ID:
projects/YOUR_GCP_PROJECT_NUMBER/locations/global/workloadIdentityPools/gitlab-ci-pool/providers/gitlab-ci-provider.
Step 2: Create a GCP Service Account and Grant Permissions
Create a service account that your GitLab CI pipeline will impersonate, and grant it the necessary permissions (e.g., roles/storage.admin, roles/run.developer).
gcloud iam service-accounts create "gitlab-ci-sa" \
    --project="YOUR_GCP_PROJECT_ID" \
    --display-name="GitLab CI Service Account"

gcloud projects add-iam-policy-binding "YOUR_GCP_PROJECT_ID" \
    --member="serviceAccount:gitlab-ci-sa@YOUR_GCP_PROJECT_ID.iam.gserviceaccount.com" \
    --role="roles/storage.admin" # Example role

# Add more roles as needed
Step 3: Grant the Workload Identity Provider Access to the Service Account
This step links the Workload Identity Provider to the service account, allowing identities authenticated via the provider to impersonate the service account.
gcloud iam service-accounts add-iam-policy-binding "gitlab-ci-sa@YOUR_GCP_PROJECT_ID.iam.gserviceaccount.com" \
    --project="YOUR_GCP_PROJECT_ID" \
    --role="roles/iam.workloadIdentityUser" \
--member="principalSet://iam.googleapis.com/projects/YOUR_GCP_PROJECT_NUMBER/locations/global/workloadIdentityPools/gitlab-ci-pool/subject/YOUR_GITLAB_GROUP/YOUR_PROJECT"Note: The subject in the principalSet should match the google.subject attribute mapping and project_path condition you defined earlier. For GitLab, the sub claim is the full project path group/project.
Step 4: Update Your GitLab CI .gitlab-ci.yml
GitLab CI automatically exposes the OIDC token via the CI_OIDC_ID_TOKEN environment variable. You'll use this with the gcloud CLI.
stages:
  - deploy

deploy-to-gcp:
  stage: deploy
  image: google/cloud-sdk:latest
  id_tokens:
    GCP_OIDC_TOKEN: # Define a custom ID token name
      aud: https://iam.googleapis.com/projects/YOUR_GCP_PROJECT_NUMBER/locations/global/workloadIdentityPools/gitlab-ci-pool/providers/gitlab-ci-provider # The audience for the token
  script:
    - |-
      # Authenticate with GCP using the OIDC token
      gcloud auth login --cred-file="${GCP_OIDC_TOKEN_FILE}" --project="YOUR_GCP_PROJECT_ID"
      # Set the active service account to the one federated
      gcloud config set auth/impersonate_service_account "gitlab-ci-sa@YOUR_GCP_PROJECT_ID.iam.gserviceaccount.com"
      # Now you can run GCP commands with the impersonated service account's permissions
      gcloud storage cp ./build/* gs://your-gcp-bucket/
      gcloud run deploy my-service --image gcr.io/YOUR_GCP_PROJECT_ID/my-image --region us-central1
  rules:
    - if: $CI_COMMIT_BRANCH == "main"
Key points:
id_tokens: GCP_OIDC_TOKEN:: This block explicitly requests an OIDC token for a specific audience. The audience (aud) should be the full resource name of your Workload Identity Provider.GCP_OIDC_TOKEN_FILE: GitLab automatically makes the requested OIDC token available as a file path in an environment variable namedYOUR_TOKEN_NAME_FILE(e.g.,GCP_OIDC_TOKEN_FILE).gcloud auth login --cred-file="${GCP_OIDC_TOKEN_FILE}": Authenticates thegcloudCLI using the OIDC token.gcloud config set auth/impersonate_service_account: This step is crucial. It tellsgcloudto use the federated identity to impersonate the specified service account, gaining its permissions.
Section 3: OIDC in Azure DevOps with Azure AD Workload Identity Federation
Azure DevOps pipelines can leverage Azure AD Workload Identity Federation to authenticate to Azure resources without managing service principal secrets or certificates.
Step 1: Create an Azure AD Application Registration
This application registration represents your CI/CD pipeline in Azure AD.
- Go to Azure Portal -> Azure Active Directory -> App registrations -> New registration.
- Give it a name (e.g.,
ado-ci-deployment). - For "Supported account types", choose the appropriate option (e.g., "Accounts in this organizational directory only").
- Leave "Redirect URI" blank.
- Click "Register".
Note down the Application (client) ID and Directory (tenant) ID.
Step 2: Add Federated Credentials to the App Registration
This step establishes the trust relationship between your Azure AD app and your Azure DevOps pipeline.
- In your App registration, go to "Certificates & secrets" -> "Federated credentials" tab.
- Click "Add credential".
- Federated credential scenario: "Other issuer"
- Issuer:
https://vstoken.dev.azure.com/YOUR_AZURE_DEVOPS_ORG_ID(ReplaceYOUR_AZURE_DEVOPS_ORG_IDwith the GUID of your Azure DevOps organization, which can be found in the URL when you're in your ADO org settings, usually after_AzureDevOps/) orhttps://oidc.prod.cms.microsoft.com/aad/YOUR_AZURE_TENANT_ID/v2.0for self-hosted agents or specific scenarios. - Subject identifier: This is the unique identifier for your pipeline or project. For Azure DevOps, it's typically a combination like
project_id:YOUR_ADO_PROJECT_ID:runid:YOUR_PIPELINE_RUN_IDor more generallyproject_id:YOUR_ADO_PROJECT_ID.- For a specific project:
project_id:<Azure DevOps Project ID> - For a specific pipeline:
project_id:<Azure DevOps Project ID>:pipeline_id:<Pipeline Definition ID> - For a specific branch:
project_id:<Azure DevOps Project ID>:branch:refs/heads/main - For a specific environment:
project_id:<Azure DevOps Project ID>:environment:<Environment Name>
project_id:<Azure DevOps Project ID>. - For a specific project:
- Name: A descriptive name (e.g.,
ado-main-branch-deploy). - Click "Add".
Step 3: Grant the App Registration Permissions
Assign the necessary Azure RBAC roles to this App registration (acting as a service principal) on the resources it needs to access (e.g., Contributor role on a resource group, Storage Blob Data Contributor on a storage account).
# Example: Grant Contributor role to a resource group
az role assignment create \
    --role "Contributor" \
    --assignee-object-id YOUR_APP_REGISTRATION_OBJECT_ID \
    --assignee-principal-type ServicePrincipal \
    --scope "/subscriptions/YOUR_SUBSCRIPTION_ID/resourceGroups/YOUR_RESOURCE_GROUP_NAME"

# Get the Object ID of the service principal from the App Registration's 'Overview' -> 'Managed application in local directory' -> 'Object ID'
Step 4: Update Your Azure DevOps Pipeline
Azure DevOps pipelines can use the Azure/login@v1 task with Workload Identity Federation.
trigger:
  branches:
    include:
      - main

pool:
  vmImage: 'ubuntu-latest'

steps:
- task: AzureCLI@2
  displayName: 'Display Azure DevOps context'
  inputs:
    scriptType: 'bash'
    scriptLocation: 'inlineScript'
    inlineScript: |
      echo "System.TeamProject: $(System.TeamProject)"
      echo "System.DefinitionId: $(System.DefinitionId)"
      echo "Build.Repository.Name: $(Build.Repository.Name)"
      echo "Build.SourceBranch: $(Build.SourceBranch)"
      echo "System.AccessToken available: $(System.AccessToken)"

- task: AzureLogin@1 # Use AzureLogin@1 or AzureLogin@2
  displayName: 'Azure Login with Workload Identity Federation'
  inputs:
    clientid: 'YOUR_APP_REGISTRATION_CLIENT_ID' # Application (client) ID from App Registration
    tenantid: 'YOUR_AZURE_TENANT_ID' # Directory (tenant) ID from App Registration
    subscriptionId: 'YOUR_AZURE_SUBSCRIPTION_ID'
    serviceConnectionName: 'YourADOARMServiceConnection' # Name of an existing ARM service connection, used for context but not credentials
    enableFederatedToken: true # This enables OIDC-based authentication

- task: AzureCLI@2
  displayName: 'Run Azure CLI commands'
  inputs:
    azureSubscription: 'YourADOARMServiceConnection' # Reference the service connection for subscription context
    scriptType: 'bash'
    scriptLocation: 'inlineScript'
    inlineScript: |
      az account show
      az storage blob upload --account-name yourstorageaccount --container-name web --file "$(System.DefaultWorkingDirectory)/index.html" --name index.html
Key points:
- The
AzureLogin@1(orAzureLogin@2) task is configured withenableFederatedToken: true. This tells the task to use Workload Identity Federation. - You provide the
clientid,tenantid, andsubscriptionIddirectly in the task. Azure DevOps automatically handles fetching the OIDC token and exchanging it for an Azure AD access token. - The
serviceConnectionNameis still required, but it acts primarily as a logical reference to the Azure subscription context, not for its credentials. - Subsequent Azure CLI tasks can then use the
azureSubscriptioninput to reference this authenticated context.
Section 4: Migrating from Env Vars to OIDC - Step-by-Step
Migrating an existing CI/CD pipeline from environment variables to OIDC requires a systematic approach. Here's a general guide:
-
Inventory Current Secret Usage: Identify all environment variables currently used for secrets in your CI/CD pipelines. Document which secrets are used by which jobs/stages and for what purpose (e.g.,
AWS_ACCESS_KEY_IDfor S3 uploads,DATABASE_PASSWORDfor integration tests). -
Map Secrets to Cloud Resources/Secret Managers: For each identified secret, determine the underlying resource it grants access to. For cloud provider credentials, this is straightforward (e.g., AWS S3 bucket, GCP Cloud Run service). For application-specific secrets, you might need to integrate with a secret manager first (see Section 5).
-
Configure OIDC Trust Relationships in Cloud Providers: For each cloud provider (AWS, GCP, Azure) your CI/CD interacts with, follow the steps outlined in Sections 1-3 to:
- Set up the OIDC Identity Provider (e.g., GitHub OIDC provider in AWS IAM).
- Create IAM roles/service accounts/app registrations.
- Define precise trust policies using OIDC claims (e.g.,
sub,aud,project_path,branch) to grant access only to the specific CI/CD contexts that need it. - Grant the necessary permissions to these new roles/identities.
-
Update CI/CD Workflows to Use OIDC: Modify your CI/CD pipeline definitions to leverage the OIDC authentication mechanism. This usually involves:
- Adding specific OIDC-related steps or tasks (e.g.,
aws-actions/configure-aws-credentials,gcloud auth login,AzureLogin@1). - Ensuring your CI/CD platform has the necessary permissions to generate OIDC tokens (e.g.,
id-token: writein GitHub Actions).
- Adding specific OIDC-related steps or tasks (e.g.,
-
Test Thoroughly: Run your updated pipelines in a non-production environment first. Verify that all operations that previously relied on environment variables now succeed using OIDC-derived temporary credentials. Check logs for any authentication errors.
-
Remove Environment Variables: Once you've confirmed that the OIDC-based authentication is working correctly, remove the old environment variables from your CI/CD system. This is a critical step to eliminate the attack surface.
-
Monitor and Audit: Continuously monitor the activity logs (e.g., AWS CloudTrail, GCP Cloud Audit Logs, Azure Activity Log) for assumed roles/identities. This provides an audit trail of which CI/CD jobs accessed which resources and when.
Section 5: Beyond Cloud Providers - Integrating with Secret Managers
While OIDC directly with cloud providers is powerful, you might still have application-specific secrets (e.g., database connection strings, third-party API keys) that don't belong to a cloud provider's IAM system directly. This is where dedicated secret managers like HashiCorp Vault, AWS Secrets Manager, Azure Key Vault, or Doppler come into play.
The good news is that OIDC can also be used to authenticate your CI/CD pipeline to these secret managers, solving the "bootstrap problem" (how to get the initial secret to access the secret manager).
Example: HashiCorp Vault with OIDC Auth Method
-
Configure Vault's OIDC Auth Method: You would configure Vault to trust your CI/CD platform's OIDC issuer.
bash# Enable the OIDC auth method vault auth enable oidc # Configure the OIDC auth method to trust GitHub Actions vault write auth/oidc/config \ oidc_discovery_url="https://token.actions.githubusercontent.com" \ oidc_client_id="sts.amazonaws.com" # Yes, use sts.amazonaws.com here as a placeholder for GitHub's aud claim # Create a role in Vault that maps OIDC claims to Vault policies vault write auth/oidc/role/github-action-role \ bound_audiences="sts.amazonaws.com" \ bound_claims="sub=repo:YOUR_GITHUB_ORG/YOUR_REPO:ref:refs/heads/main" \ policies="app-deploy-policy" \ ttl="5m" -
Update GitHub Actions Workflow: Your workflow would then fetch an OIDC token and use it to authenticate to Vault.
yamlname: Deploy with Vault Secrets on: [push] jobs: deploy: runs-on: ubuntu-latest permissions: id-token: write contents: read steps: - uses: actions/checkout@v4 - name: Get Vault Token via OIDC id: vault_auth run: | # VAULT_ADDR and VAULT_OIDC_ROLE environment variables are set # You might need a helper script or action here OIDC_TOKEN=$(cat $ACTIONS_ID_TOKEN_REQUEST_TOKEN_PATH) echo "OIDC_TOKEN_PATH: $ACTIONS_ID_TOKEN_REQUEST_TOKEN_PATH" echo "VAULT_ADDR: ${{ secrets.VAULT_ADDR }}" echo "VAULT_OIDC_ROLE: github-action-role" # This is a simplified example; often a dedicated action or custom script is used # For a more robust solution, use hashicorp/vault-action VAULT_TOKEN=$(vault write -field=client_token auth/oidc/login \ role=github-action-role \ jwt="$OIDC_TOKEN") echo "VAULT_TOKEN::$VAULT_TOKEN" >> $GITHUB_OUTPUT env: VAULT_ADDR: ${{ secrets.VAULT_ADDR }} ACTIONS_ID_TOKEN_REQUEST_TOKEN: ${{ runner.token }} ACTIONS_ID_TOKEN_REQUEST_URL: ${{ github.server_url }}/api/v3/actions/id_token - name: Read secret from Vault run: | # Use the VAULT_TOKEN to read secrets DB_PASSWORD=$(vault kv get -field=password secret/my-app/prod/db) echo "DB_PASSWORD is now available for use" # Use DB_PASSWORD in your deployment script env: VAULT_TOKEN: ${{ steps.vault_auth.outputs.VAULT_TOKEN }}
This pattern allows your CI/CD pipeline to get temporary credentials to access the secret manager, which then provides temporary application secrets. This creates a highly secure chain of trust.
Best Practices for OIDC Secret Management
To maximize the security benefits of OIDC in your CI/CD pipelines, adhere to these best practices:
-
Least Privilege: Always apply the principle of least privilege. The IAM roles/service accounts assumed by your CI/CD pipelines should only have the minimum permissions absolutely necessary to perform their tasks. Avoid broad permissions like
*orAdminAccess. -
Granular Trust Policies: Leverage the rich set of claims provided in OIDC tokens (e.g.,
repo,branch,environment,project_path,pipeline_id) to create highly granular trust conditions. This ensures that only specific workflows, branches, or environments can assume particular roles. -
Short-Lived Tokens and Sessions: OIDC inherently provides short-lived tokens. Ensure that the session durations for assumed roles/identities are also kept to a minimum (e.g., 15 minutes to 1 hour). This limits the window of opportunity for an attacker if a temporary credential is compromised.
-
Audit and Monitor: Enable and regularly review audit logs (e.g., AWS CloudTrail, GCP Cloud Audit Logs, Azure Activity Log) for
AssumeRoleWithWebIdentityor equivalent actions. Monitor for unusual activity or failed authentication attempts. -
Regular Review of Trust Policies: Periodically review your OIDC trust policies and IAM role permissions. Remove any roles or conditions that are no longer needed. As projects evolve, permissions can become stale or over-privileged.
-
Secure Your CI/CD Platform Itself: While OIDC secures the interaction with external systems, the CI/CD platform itself must be secure. Protect access to repository settings, workflow definitions, and CI/CD environment variables that might still contain non-OIDC related secrets.
-
Use Dedicated Actions/Tasks: Whenever possible, use official or well-vetted CI/CD actions/tasks (like
aws-actions/configure-aws-credentialsfor GitHub Actions orAzureLogin@1for Azure DevOps) that abstract away the complexity of OIDC token exchange and credential configuration.
Common Pitfalls and How to Avoid Them
Migrating to OIDC can introduce new complexities. Be aware of these common pitfalls:
-
Overly Broad IAM Policies: The most common mistake is creating IAM roles/service accounts with too many permissions or trust policies that are too permissive (e.g.,
sub: "*"). This defeats the purpose of OIDC's fine-grained control. Always restrict by repository, branch, or environment. -
Misconfigured OIDC Provider/Audience: Incorrect issuer URLs or audience claims will prevent the cloud provider from validating the JWT. Double-check these values during setup.
-
Forgetting to Remove Old Environment Variables: A common oversight. If you leave the old
AWS_ACCESS_KEY_IDandAWS_SECRET_ACCESS_KEYenvironment variables in place after migrating to OIDC, the pipeline might still use them, negating the security benefits. Always remove the old secrets. -
Lack of
id-token: writePermission (GitHub Actions): GitHub Actions workflows explicitly requirepermissions: id-token: writeto generate OIDC tokens. Forgetting this will lead to authentication failures. -
Not Understanding OIDC Claims: Each CI/CD provider generates slightly different claims in its JWT. Understand which claims are available (e.g.,
repo,ref,environmentfor GitHub;project_path,namespace_pathfor GitLab) and how to use them effectively in your trust conditions. -
Hardcoding Service Account IDs/Role ARNs: While you provide these during setup, avoid hardcoding them directly into numerous pipeline files if you can manage them centrally or derive them programmatically, especially in multi-account or multi-environment setups.
-
Incomplete Testing: Don't assume OIDC will work perfectly on the first try. Test all affected pipelines and deployment paths thoroughly in a staging environment before rolling out to production.
Conclusion
Migrating from environment variables to OpenID Connect (OIDC) for secret management in your CI/CD pipelines is a pivotal step towards building more secure, resilient, and auditable deployment processes. By embracing an identity-based approach, you eliminate the need for long-lived, static credentials, drastically reducing the attack surface and simplifying secret rotation.
OIDC empowers you to establish a strong chain of trust between your CI/CD platform and your cloud providers or secret managers, ensuring that only authenticated and authorized pipelines can access the resources they need, with temporary, ephemeral credentials. This shift aligns with modern security principles and is a fundamental component of a robust DevSecOps strategy.
While the initial setup might seem complex, the long-term benefits in terms of security, maintainability, and peace of mind are immense. Start by identifying your most critical secrets, implement OIDC for one or two key pipelines, and then gradually expand its adoption across your entire CI/CD landscape. Your journey to more secure deployments begins now.

Written by
CodewithYohaFull-Stack Software Engineer with 7+ years of experience in Java, Spring Boot, and cloud architecture across AWS, Azure, and GCP. Writing production-grade engineering patterns for developers who ship real software.