
In today's software development world, containerization has become an essential part of the deployment process. Docker, the leading containerization platform, allows developers to build and package their applications along with all the required dependencies. Once the Docker image is created, it needs to be stored securely and efficiently somewhere for future use. This is where the AWS ECR (Elastic Container Registry) comes into play. In this article, we will discuss how to push a Docker image to the AWS ECR in a step-by-step manner.
Prerequisites
Before we begin, there are a few prerequisites that you need to fulfill:
- An AWS account: To use the AWS ECR service, you must have an AWS Account. If you don't have one, you can create a new account.
- Docker: Ensure that Docker is installed on your local machine. You can download and install Docker from the Official Docker website
Create an ECR repository
The first step is to create an ECR repository where you will push your Docker image. This can be done through the AWS Management Console or programmatically using the AWS CLI (Command Line Interface) . In this article, we will focus on the AWS Management Console.
- Login to the AWS Management Console using your AWS account credentials.
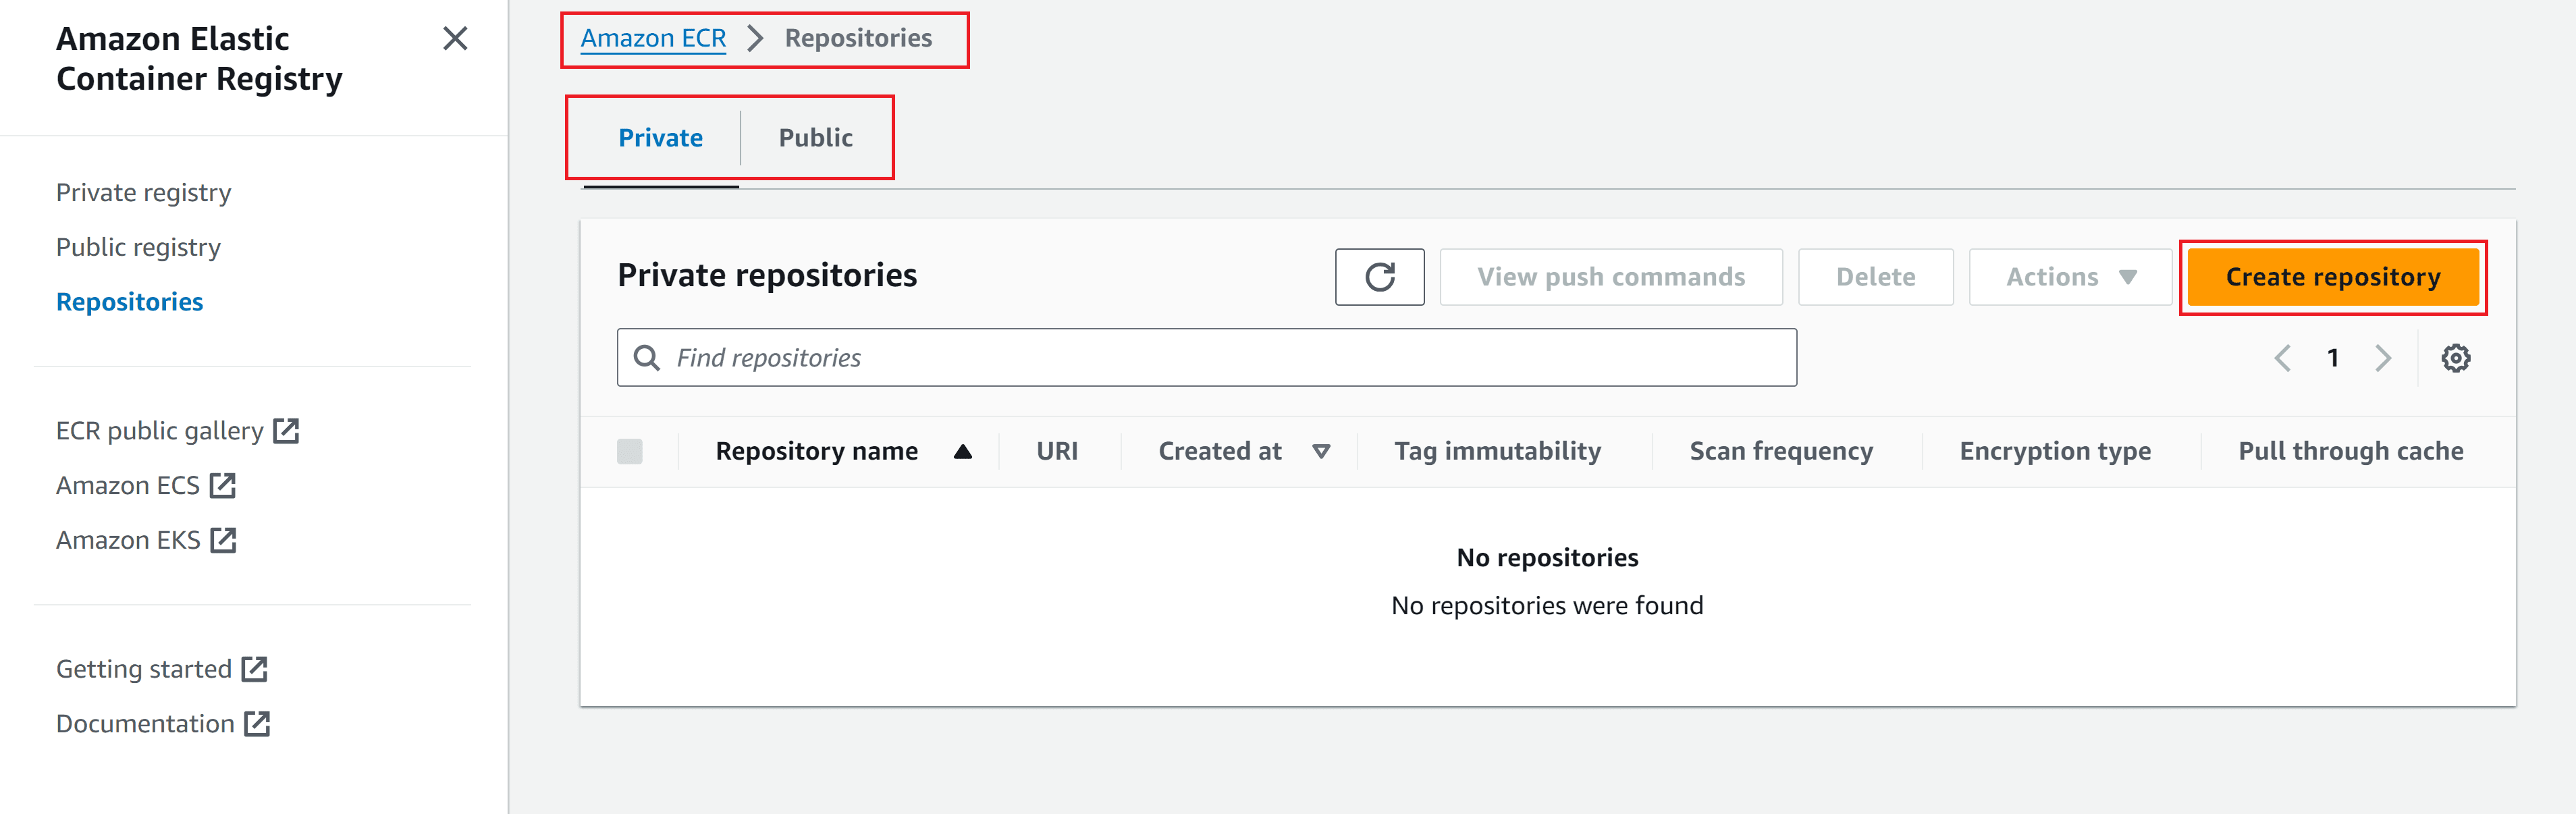
- Navigate to the Amazon Elastic Container Registry service from the console.
- Click on the
Create a repositorybutton.
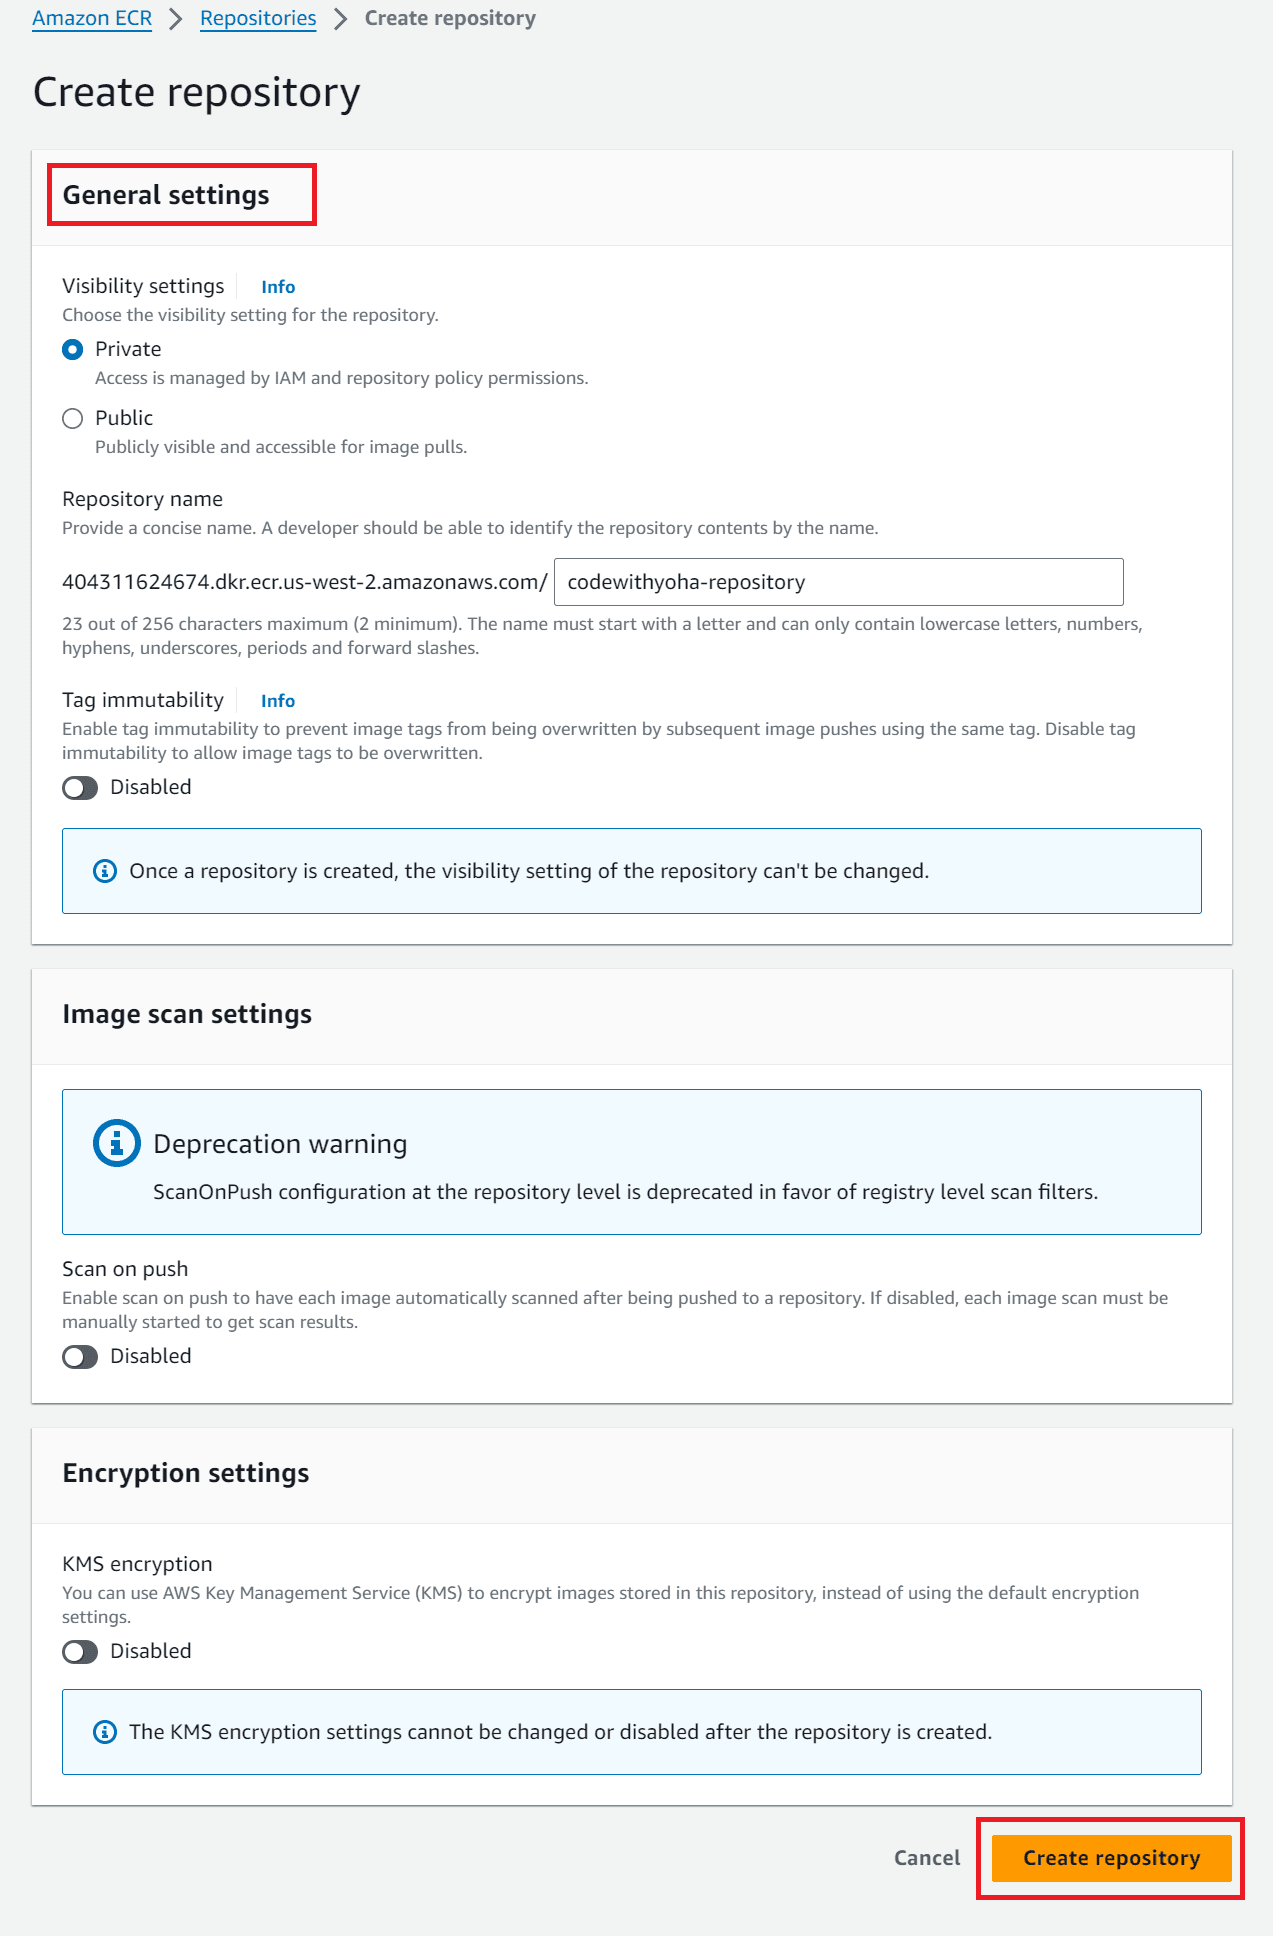
- Provide a name and visibility for your repository and click on the
Create repositorybutton to create the repository.
Authenticate Docker with AWS ECR
To push a Docker image to the AWS ECR, you need to authenticate Docker with your AWS ECR registry. This authentication ensures that Docker can securely communicate with the registry.
To do so, open the terminal and Run the following command, replacing <AWS_ACCOUNT_ID>, <AWS_REGION>, and <ECR_REPOSITORY_NAME> with the appropriate values:
aws ecr get-login-password --region <AWS_REGION> | docker login --username AWS --password-stdin <AWS_ACCOUNT_ID>.dkr.ecr.<AWS_REGION>.amazonaws.com/<ECR_REPOSITORY_NAME>
The command retrieves an authentication token from AWS ECR and uses it to authenticate Docker. Once the command is successfully executed, Docker is authenticated with the AWS ECR registry.
Build and tag your Docker image
Before pushing the Docker image to the AWS ECR, you need to build and tag your Docker image.
- Navigate to the directory where your Dockerfile is located.
- Run the following command to build the Docker image, replacing
<DOCKER_IMAGE_NAME>with a meaningful name for your image:
docker build -t <DOCKER_IMAGE_NAME>.
The command uses the Dockerfile located in the current directory to build the Docker image and tags it with the specified name.
Push the Docker image to AWS ECR
Now that you have built and tagged your Docker image, it's time to push it to the AWS ECR.
To do so, run the following command to push the Docker image to the AWS ECR:
docker push <AWS_ACCOUNT_ID>.dkr.ecr.<AWS_REGION>.amazonaws.com/<ECR_REPOSITORY_NAME>:<TAG>
Replace <AWS_ACCOUNT_ID>, <AWS_REGION>, <ECR_REPOSITORY_NAME>, and <TAG> with the appropriate values.
The command pushes the Docker image to your AWS ECR repository. Once the push is complete, you can find your Docker image in the repository.
In summary, we have discussed how to push a Docker image to the AWS ECR. We covered the steps involved, such as creating an ECR repository, authenticating Docker with AWS ECR, building and tagging the Docker image, and finally pushing it to the ECR. By following these steps, you can efficiently store and deploy your Docker images using the AWS ECR service.
That's all for this tutorial, I hope you enjoyed it, and until our next tutorial, take care.
Thank you!

Written by
CodewithYohaFull-Stack Software Engineer with 5+ years of experience in Java, Spring Boot, and cloud architecture across AWS, Azure, and GCP. Writing production-grade engineering patterns for developers who ship real software.