
The AWS API Gateway is a powerful tool that allows developers to create, deploy, and manage APIs with ease. Whether you are building a serverless application or need to expose your existing backend services to the world, the API Gateway is the solution for you. In this article, In this tutorial we will walk through the steps to create an AWS API Gateway on the AWS Console.
Step 1: Sign in to the AWS Management Console
To start creating an AWS API Gateway, you need to first log in to the AWS Management Console. If you don't have an account, you can sign up for a free tier account to get started.
Step 2: Open the API Gateway Console
Once you are logged in to the AWS Console, you need to navigate to the API Gateway service. You can either use the search bar at the top of the console or locate the service under the Networking & Content Delivery category.
Step 3: Create a New API
Once you are on the API Gateway service page, click on the "Create API" button to start creating a new API Gateway.

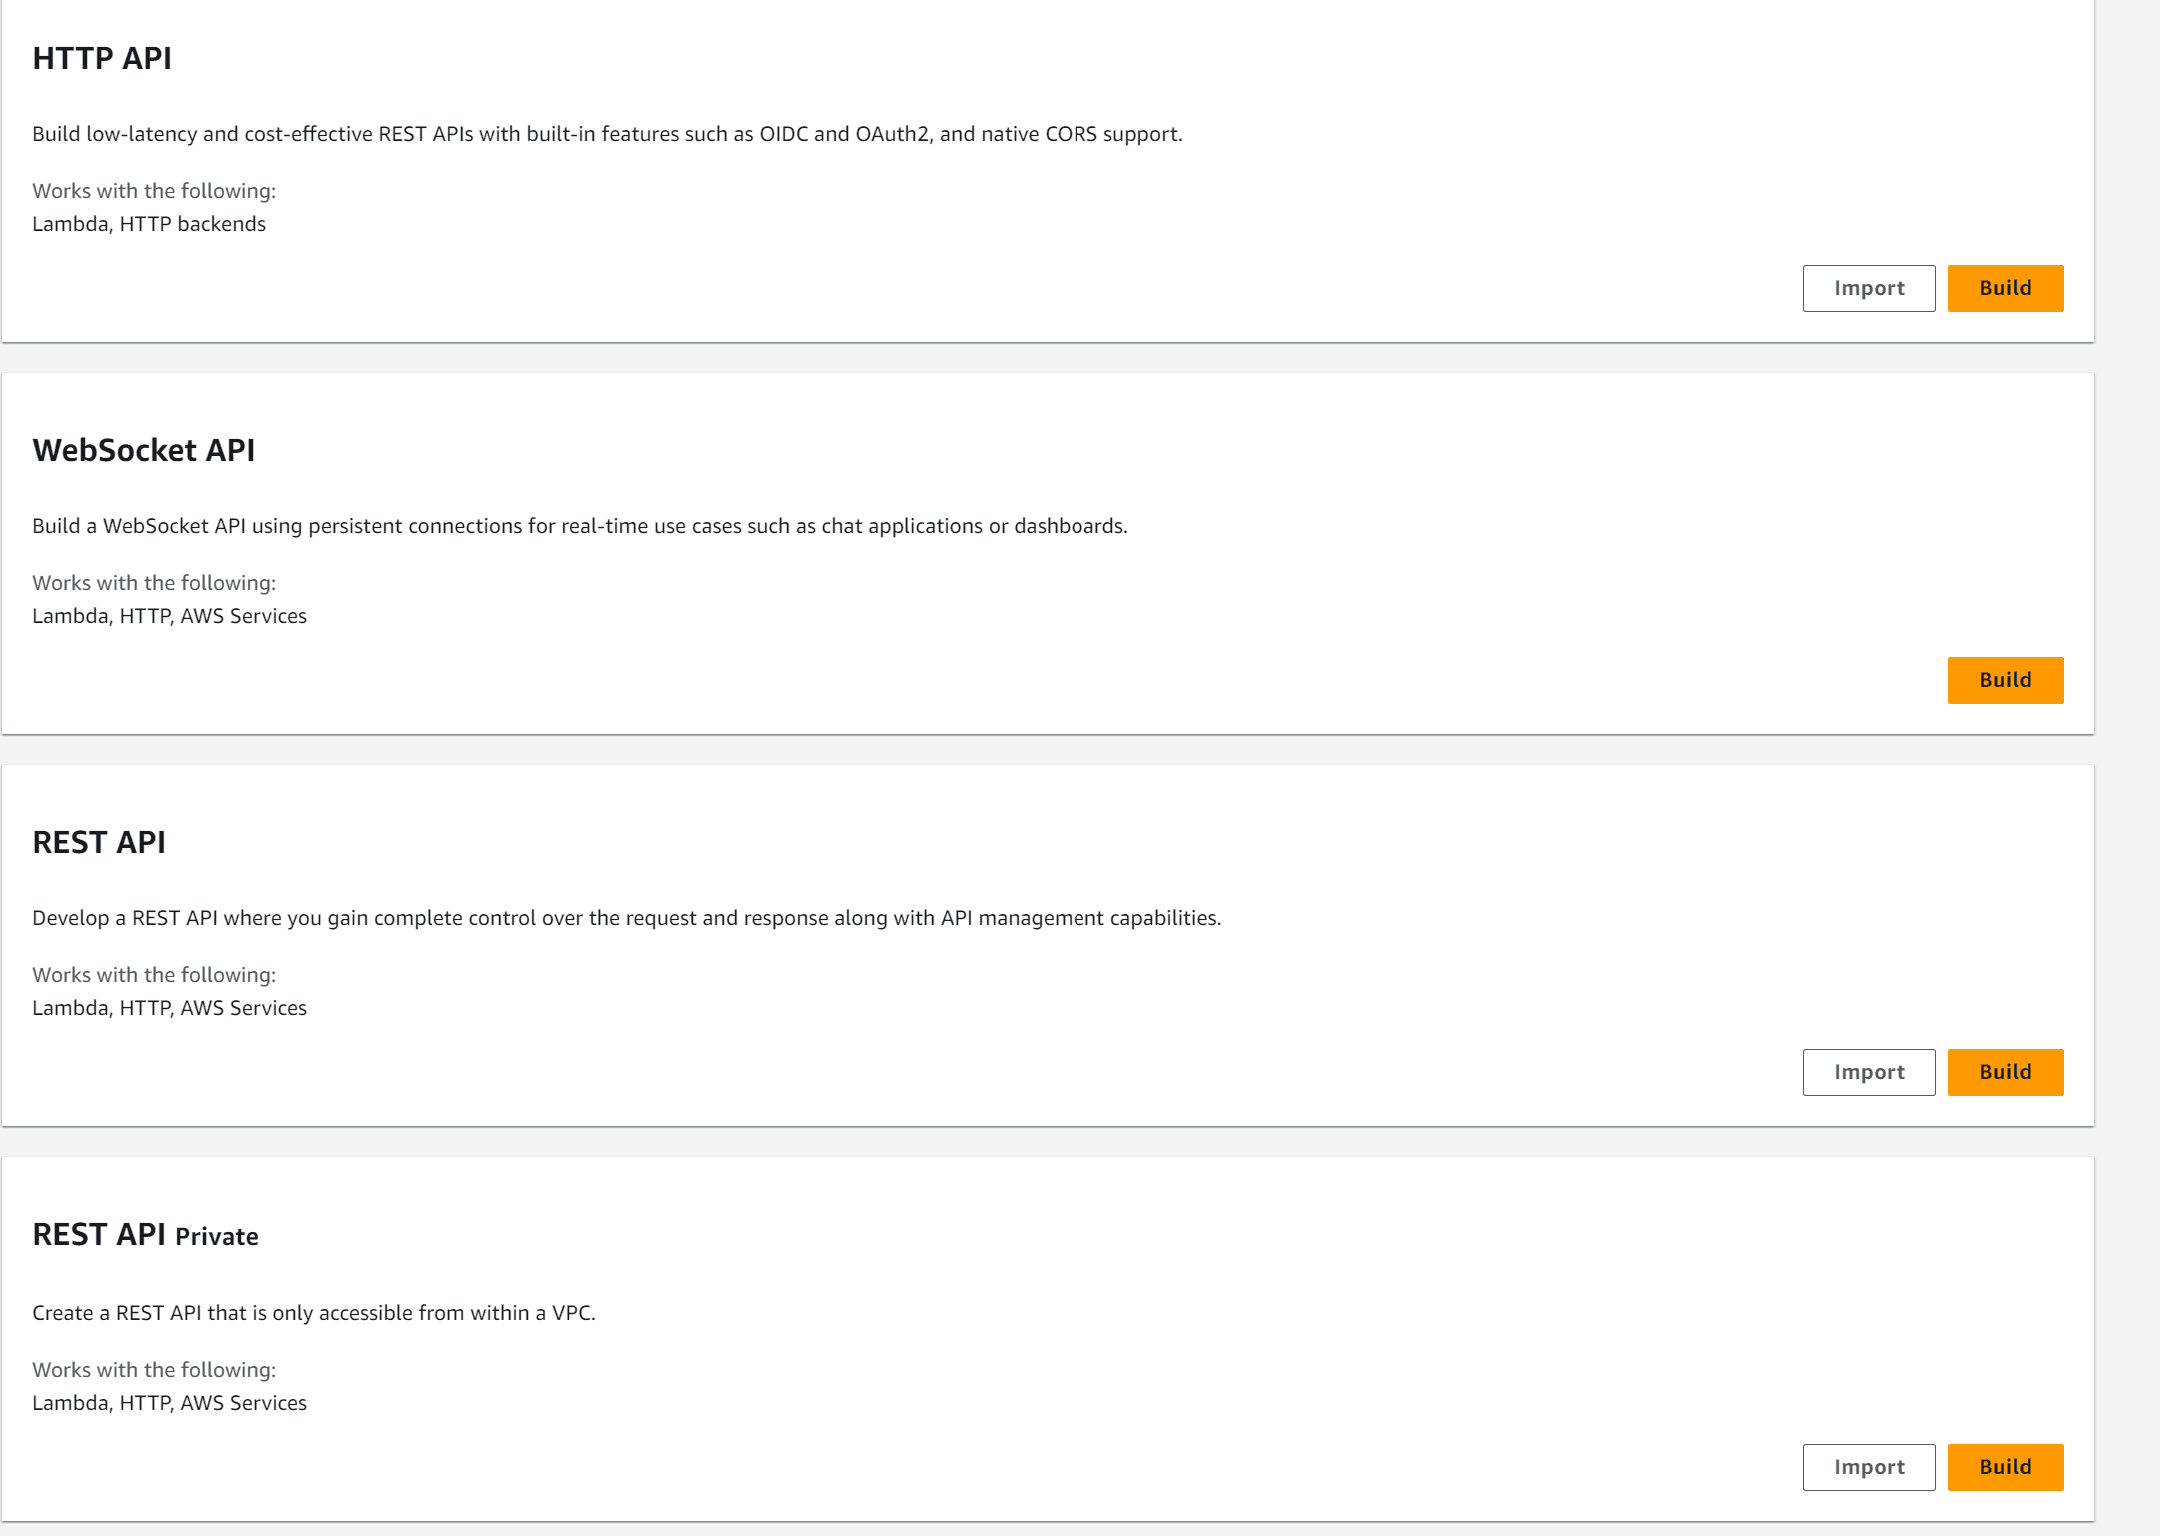
You will be presented with four options:
- HTTP API: Used to build low-latency and cost-effective REST APIs with built-in features such as OIDC and OAuth2, and native CORS support. It could be integrated with
Lambda,HTTP backends. - WebSocket API: Used to build a WebSocket API using persistent connections for real-time use cases such as chat applications or dashboards. It could be integrated
Lambda,HTTP,AWS Services. - REST API: Used to develop a REST API where you gain complete control over the request and response along with API management capabilities. It could be integrated
Lambda,HTTP,AWS Services. - REST API Private: Used to create a REST API that is only accessible from within a VPC. It could be integrated
Lambda,HTTP,AWS Services.
Choose the option that suits your requirements and click on the "Build" button.
Step 4: Configure Your API
Next, you will need to configure the API details and choose from the following options:
- New API : To ceate a new REST API.
- Clone existing API : To create a copy of an API in this AWS account..
- Import API : To import an API from an OpenAPI definition.
- Example API : To learn about API Gateway with an example API.
After choosing the option that suits your requirements, please fill in the required information as shown in the picture below for New API.
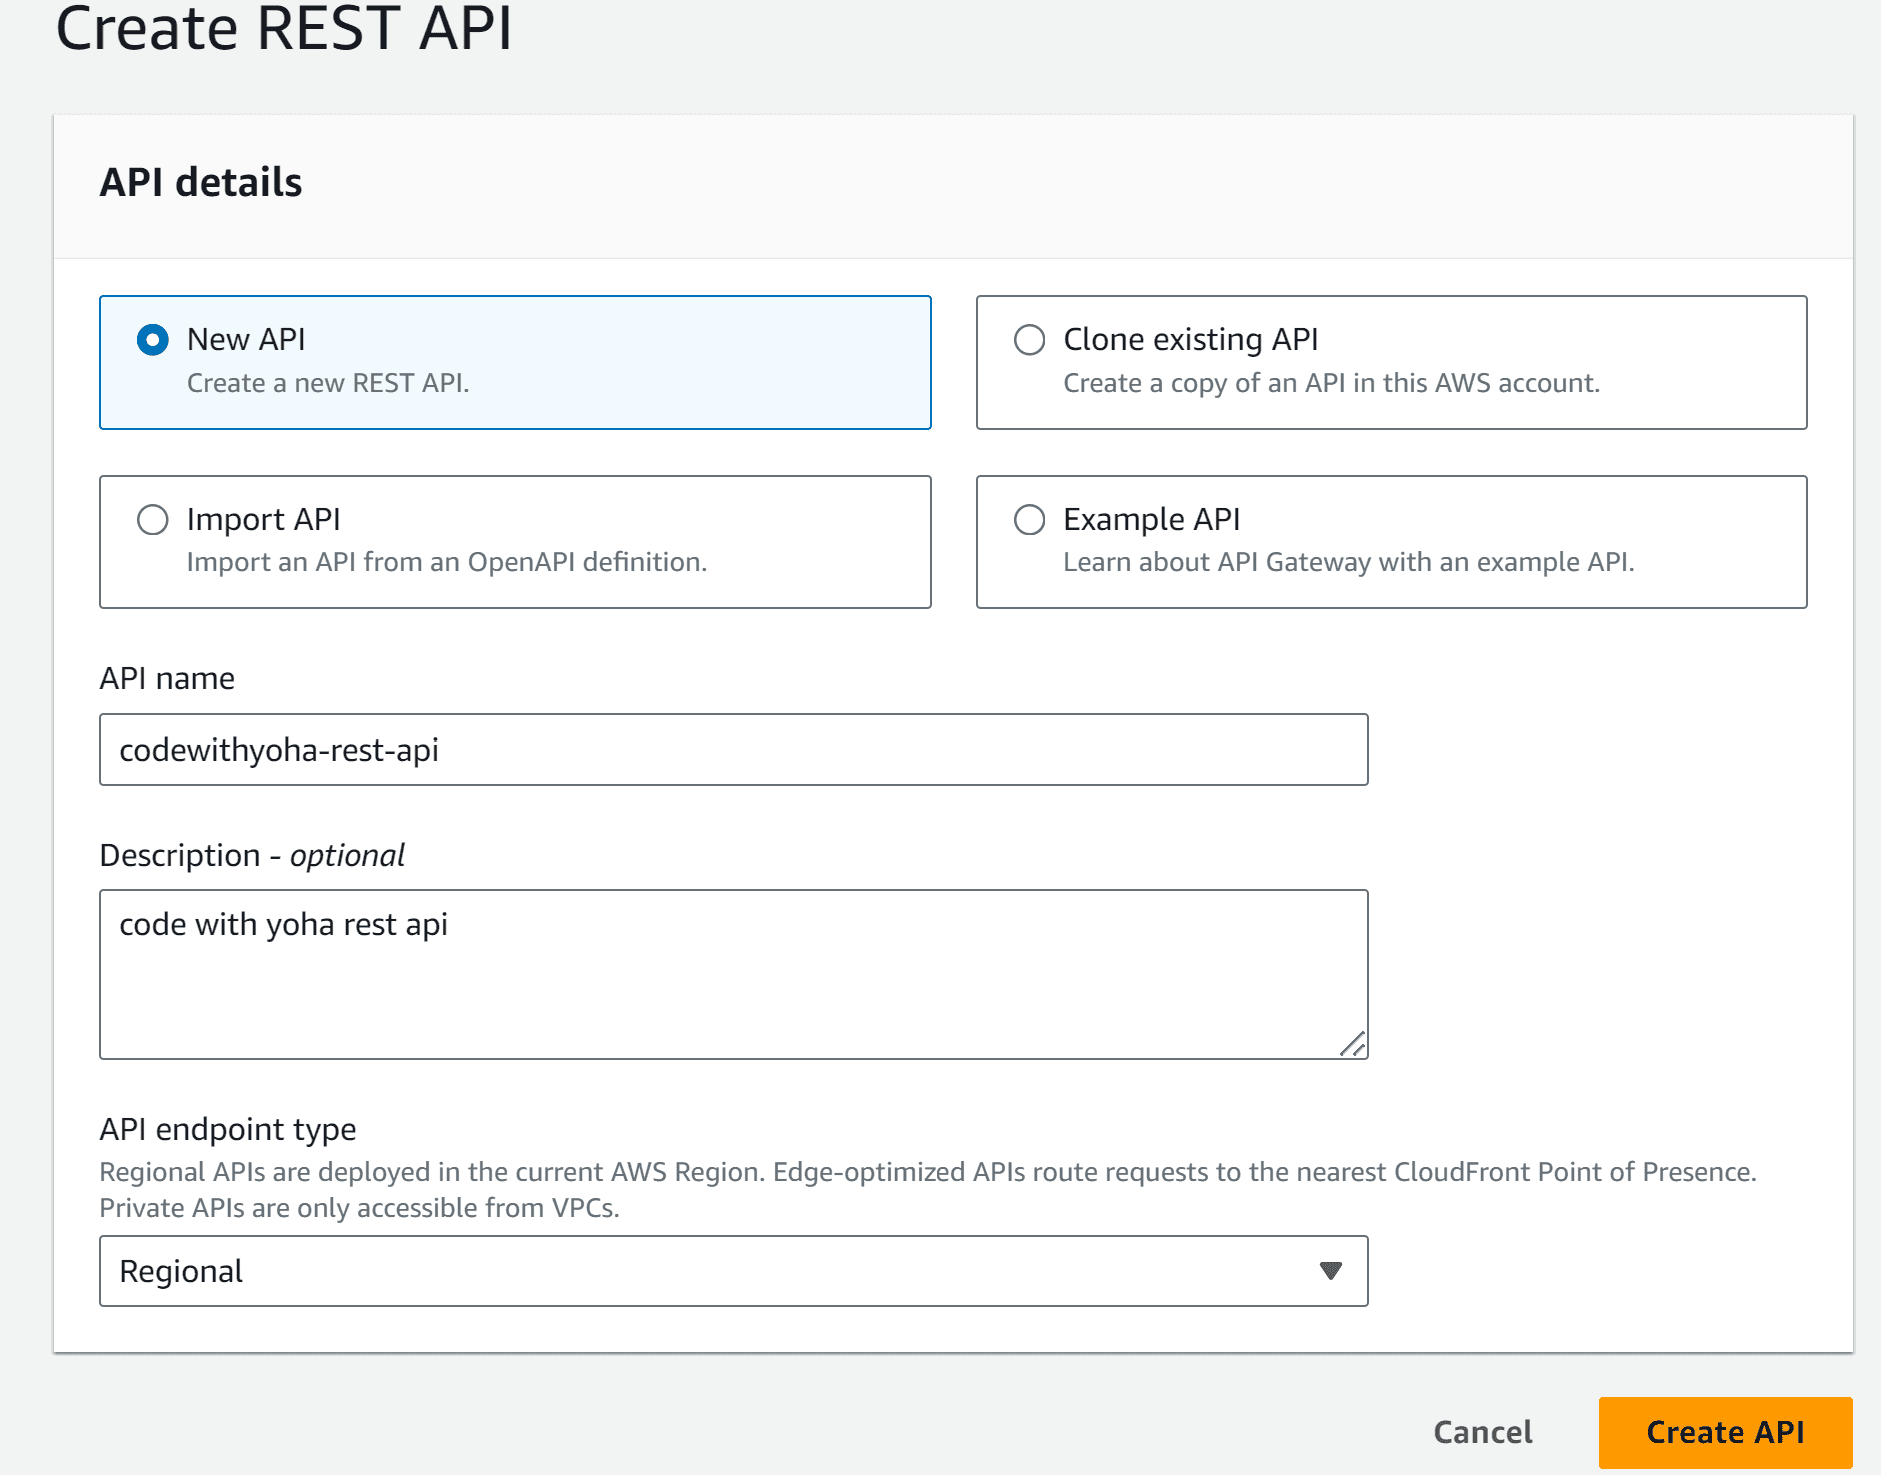
Next, click on the Create API button and you will get an interface that looks like the one shown below:
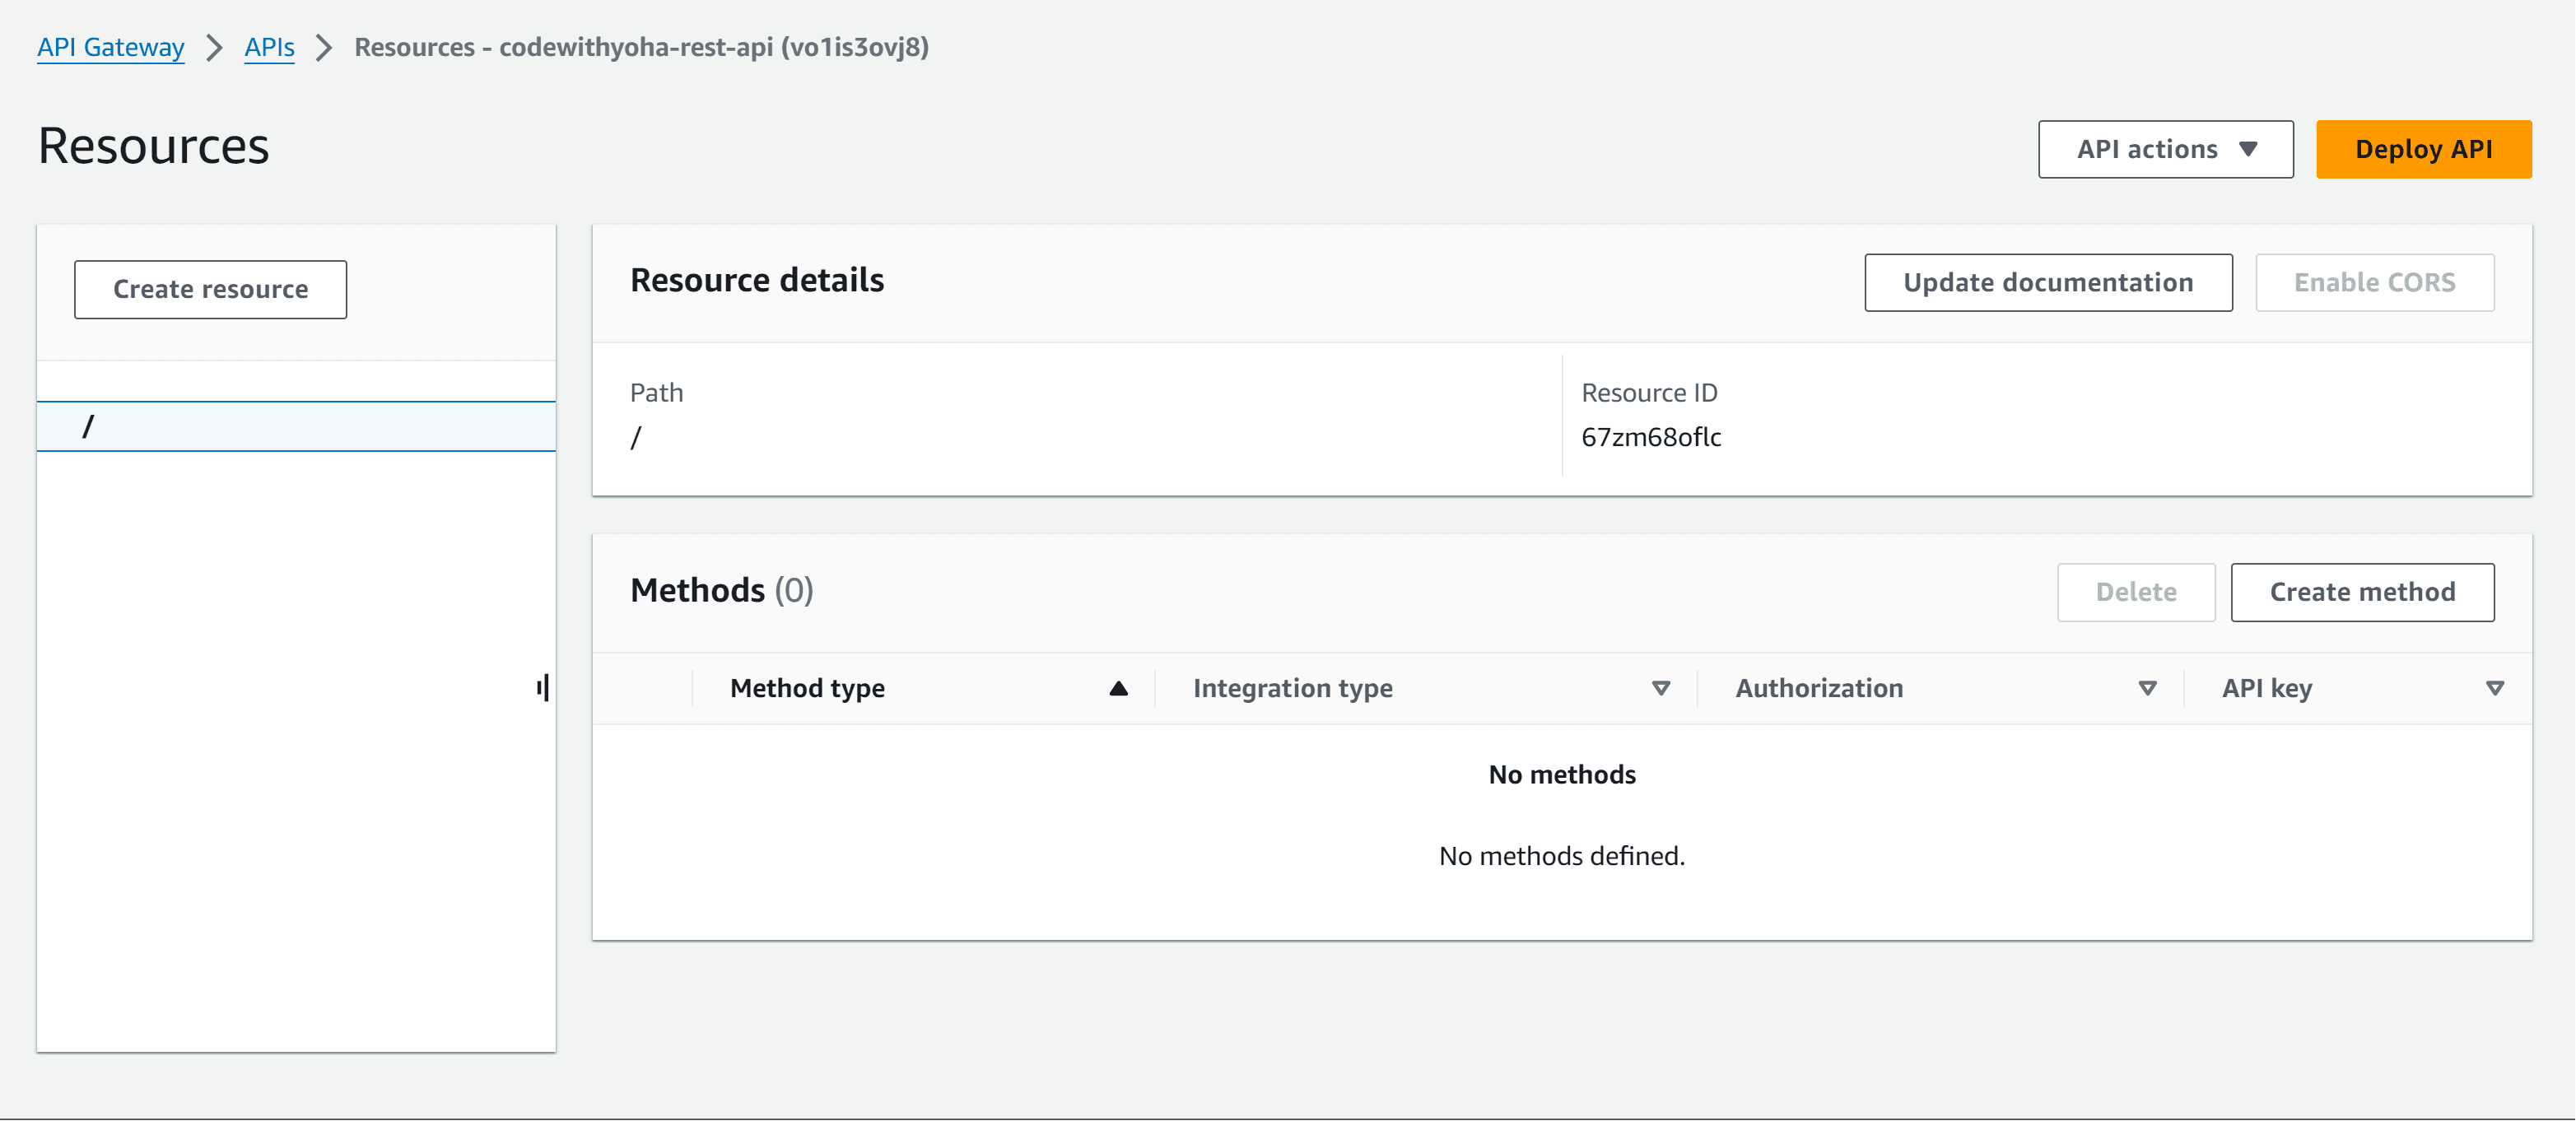
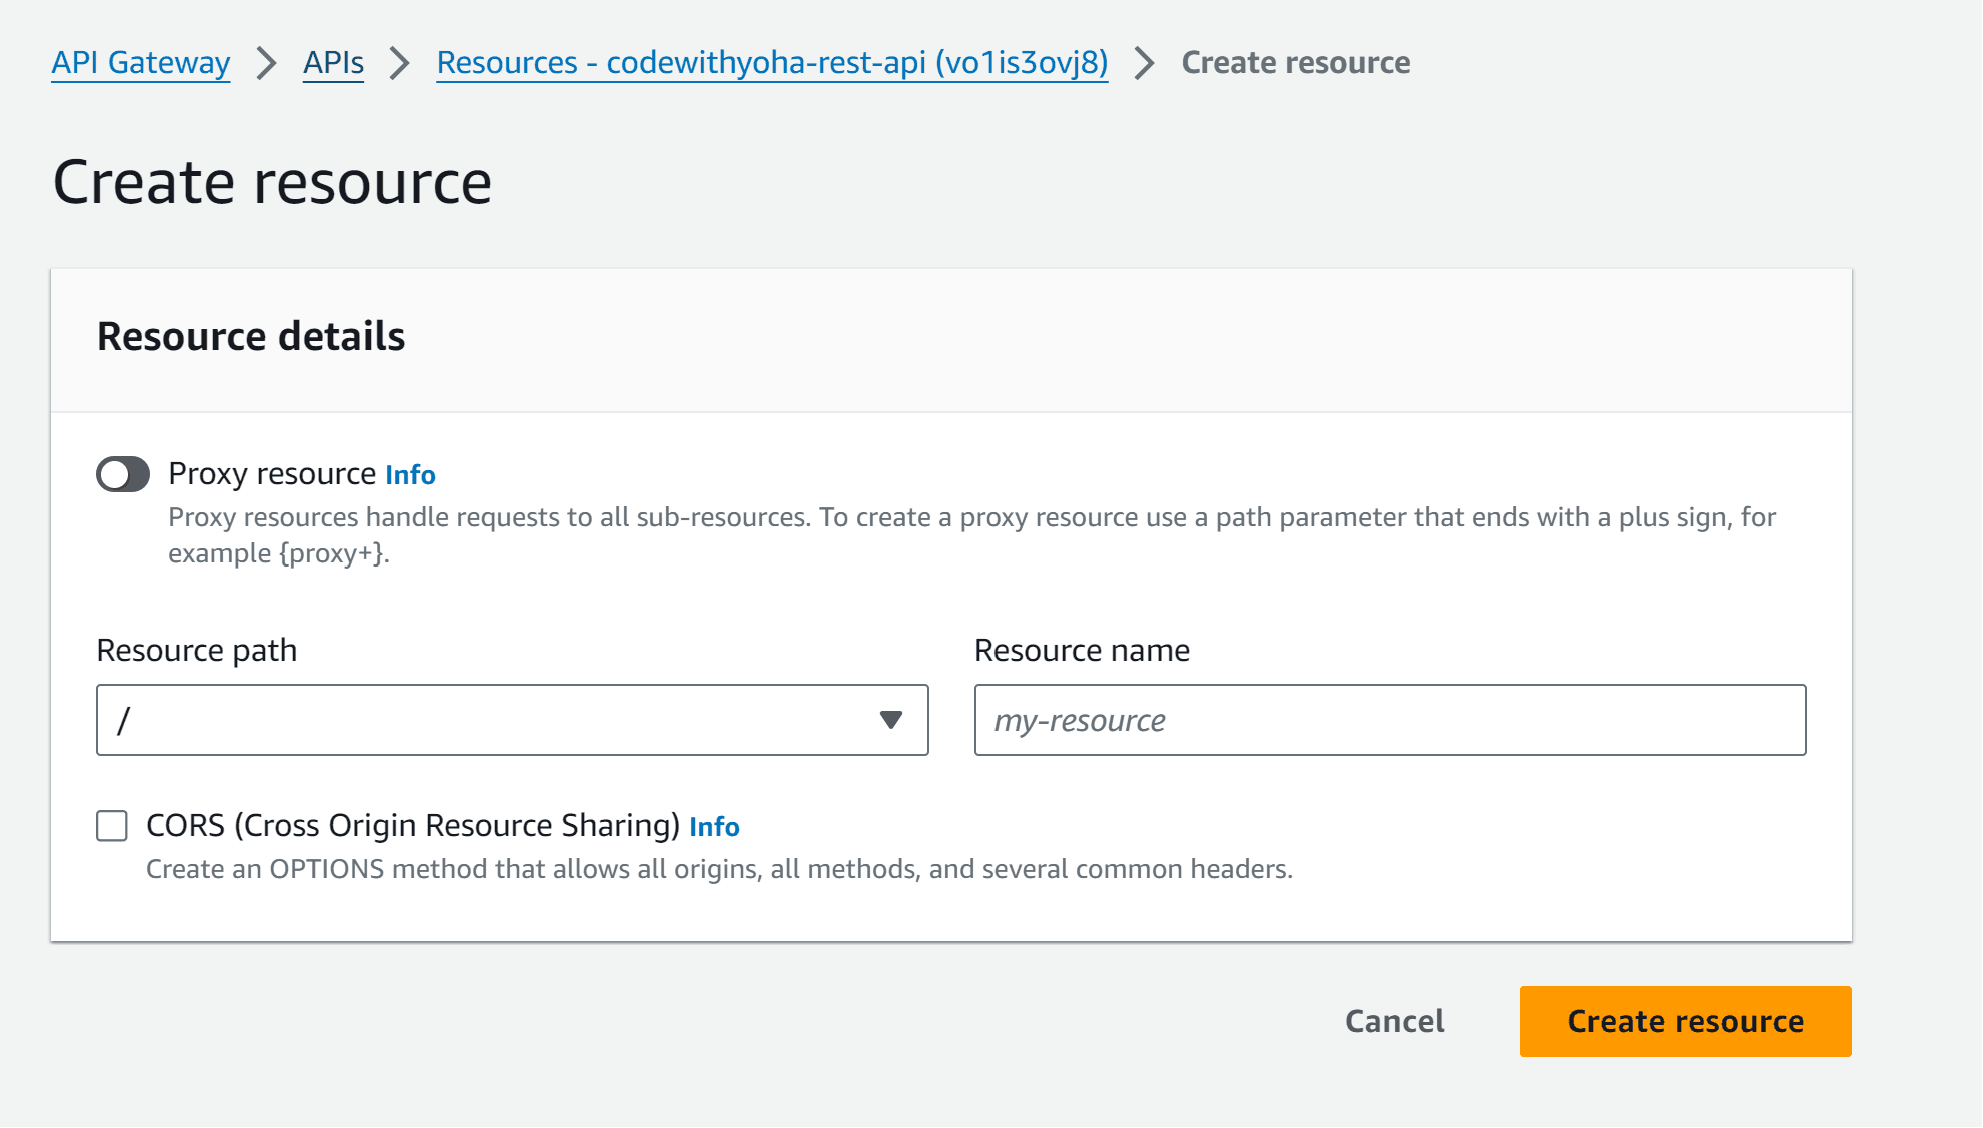
Step 5: Create a Resource
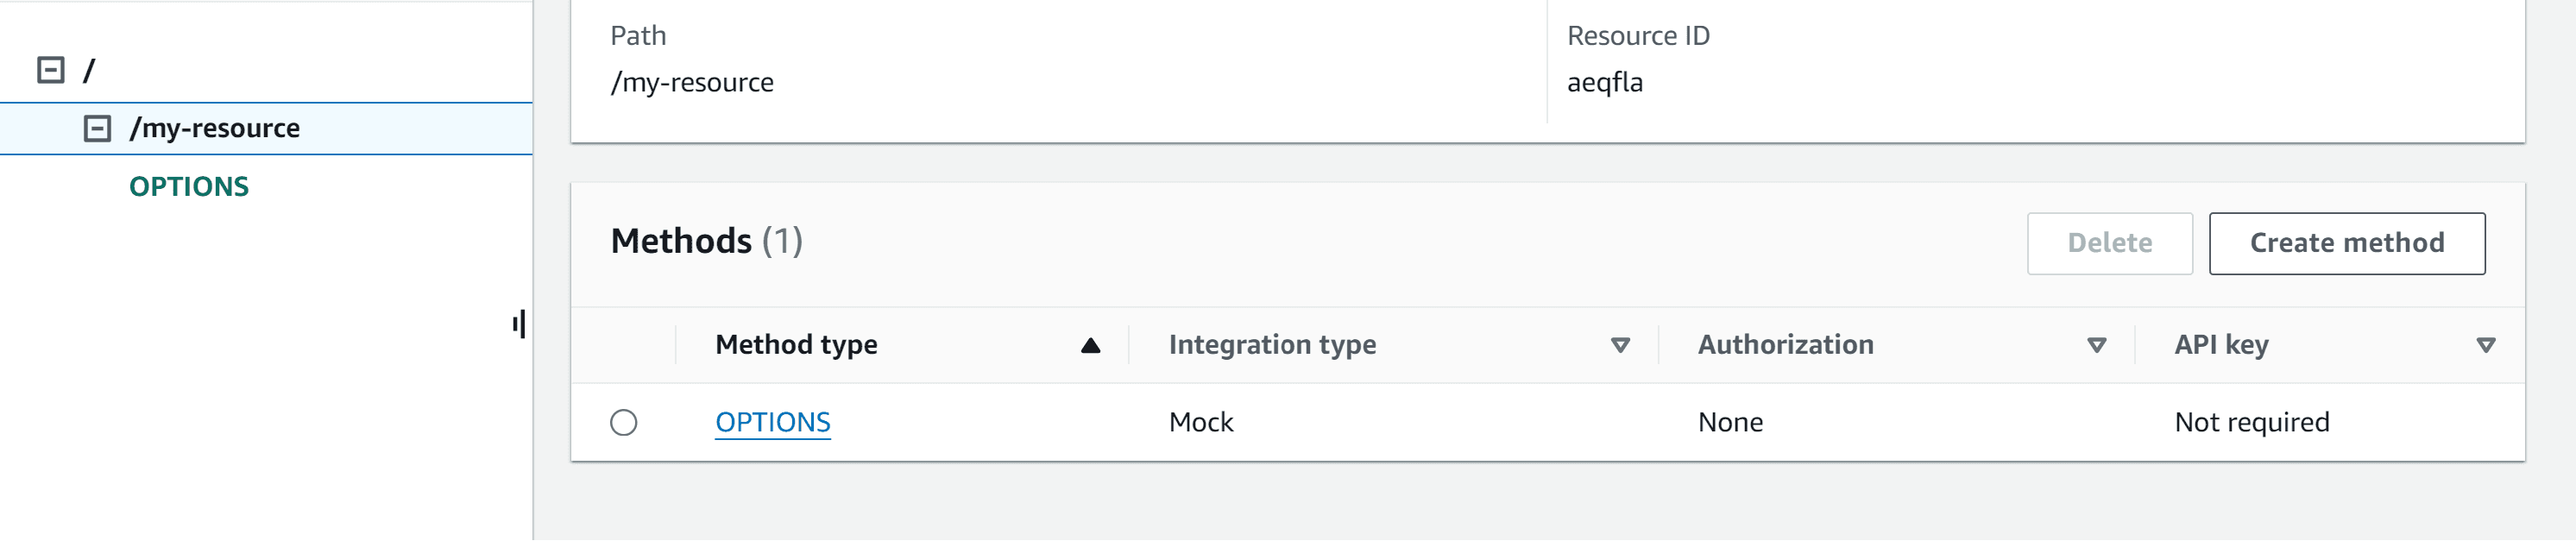
Once you have created your API, you need to create the resources that will be exposed through the API Gateway. Resources in the API Gateway represent the various endpoints or URLs of your API. You can define resources hierarchically by creating parent-child relationships. To define a resource, click on the Create Resource button. Provide a name for the resource and configure any preferred settings.
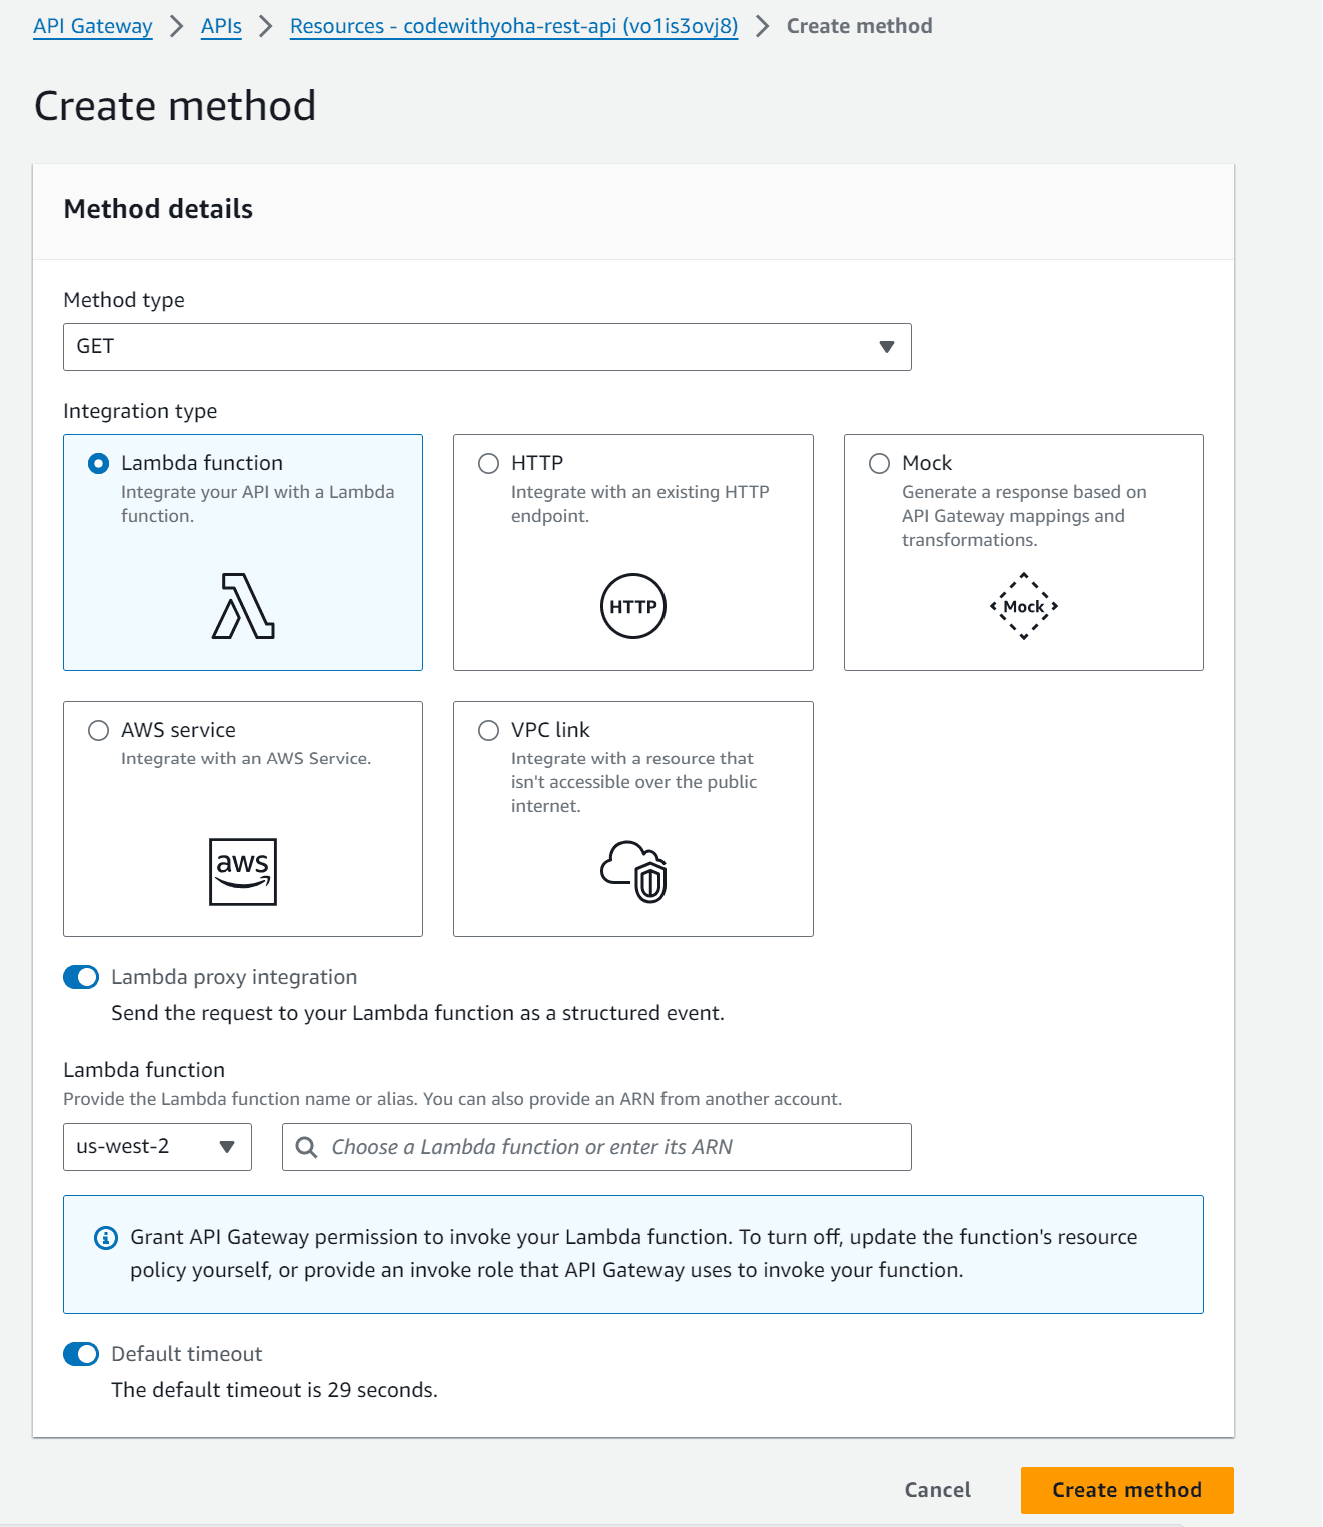
Step 6: Create and Configure a Method
After defining your API resources, you need to add methods to these resources. Methods in the API Gateway represent the HTTP methods that can be used to interact with the resources. To add a method, select the desired resource and click on the Create Method button.
After that, Choose the HTTP method you want to use and configure any required settings, You need also to configure the method integration. Method integration allows you to specify where the API Gateway should forward the incoming requests. You can integrate your API Gateway with AWS services, Lambda functions, or other HTTP endpoints. Configure the integration settings based on your requirements.
Step 8: Deploy Your API
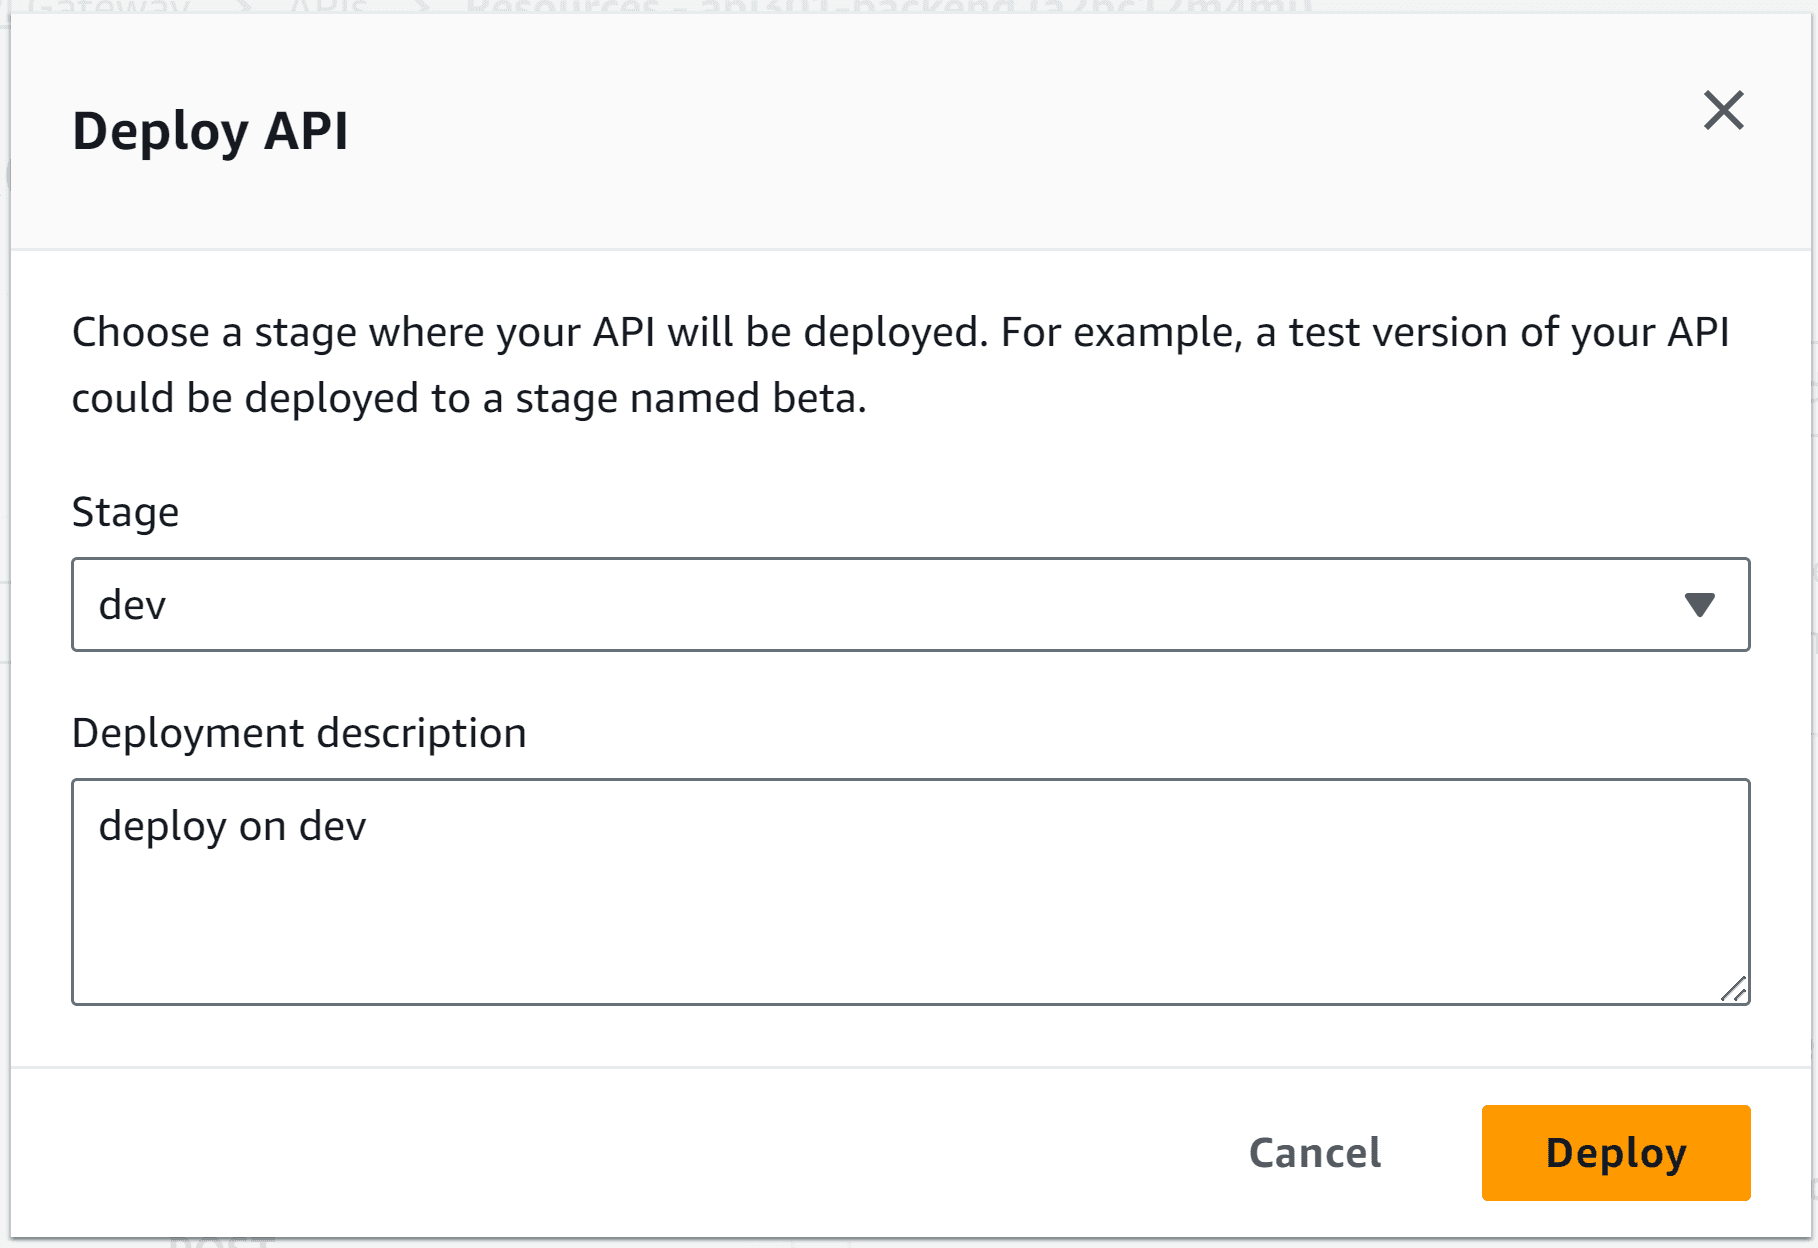
After configuring the method integration, you need to deploy your API to make it accessible to the outside world. To deploy your API, click on the Deploy API button in the top right. then fill the deployment information (destination stage and description) and click on the Deploy button. This will generate a unique URL that can be used to access your API.

Conclusion
Creating an API Gateway on the AWS Console is a straightforward process that involves a few simple steps. By following these steps, you can easily create, deploy, and manage APIs on AWS. So, whether you are a developer building a serverless application or a business owner looking to expose your services, the AWS API Gateway is the perfect solution for all your API needs.
That's it for this tutorial, thank you!

Written by
CodewithYohaFull-Stack Software Engineer with 5+ years of experience in Java, Spring Boot, and cloud architecture across AWS, Azure, and GCP. Writing production-grade engineering patterns for developers who ship real software.